
Tiramisu Cookies
 |
|
| These Tiramisu Cookies capture everything you love about the Italian dessert in one bite. Espresso-infused cookies get topped with a…
|
|
|
Tags: Dessert |
The post Tiramisu Cookies appeared first on A Cozy Kitchen.
Festive Scenes in Paris

Bonjour! I’ve been out each day photographing the holiday splendor that is appearing all over Paris now. While decor is still being installed, here is a first look at those locations that are spreading joy this week. First is the gorgeous Ritz Paris hotel tree, above, which this year features hundreds of adorable Ritz bellboy teddy bears. The playful atmosphere they convey adds a special charm to the formal elegance of The Ritz. And the bears can be purchased right on site or on the Ritz Paris website.


Another magnificent tree is at the Intercontinental Le Grand Hotel (below). Created in coordination with Repetto, the pink decor features ballet motifs with slippers and tutus. And as a special connection, the designer of the Le Grand tree, Emma Sosa, is the daughter of the designer of the Ritz tree, Anne Vitchen, the Ritz in house floral designer. They also do the Opera Garnier tree and many others in town. They are the queens of the holiday trees in Paris!

The Intercontinental Le Grand Hotel is a wonderful spot for afternoon tea with a perfect view of this enchanting tree.


A few miles away, on Avenue Montaigne, the Dior flagship store once again features a visual extravaganza of light and color (below).

The windows feature a golden model of the Alexandre III Bridge and iconic scenes from the legendary house.


The Dior store on Rue Saint-Honoré features this twinkly forest scene (below).

Among my favorite places are the local florist shops that take great care to create a festive and cozy haven where residents purchase arrangements and trees for their homes.


This cafe on Boulevard Saint-Germain is holiday-ready year round with its red awnings next to the massive red door but adds extra dazzle at this time of year with garlands and trees.

I hope you’ve enjoyed this tour of holiday wonder in Paris! More to come as I make my way around the city. Wishing you a most joyful season!
With love from Paris,
xo
G
Back to Work


Night Feedings


How to Build a Christmas Cookie Box
 |
|
| There’s something so special about giving (and receiving!) a beautifully packed box of Christmas cookies. I’m talking about those gorgeous,…
|
|
The post How to Build a Christmas Cookie Box appeared first on A Cozy Kitchen.

Going Hunting
As time passed, and Baron slowly recovered from his injuries the previous winter, he started to regain his strength and return to some of his favourite activities. Like going hunting with Rex.


Putting the Newborns in their Cradle
After the birth of their twins, Baron got into the bed with Naomi and the babies ... and they lay there for a while just watching them


Memories of the Early Days
Baron's Reaction
After the revelation, Dominic and Baron went out to the terrace to talk....


“How are you feeling?” she asked.


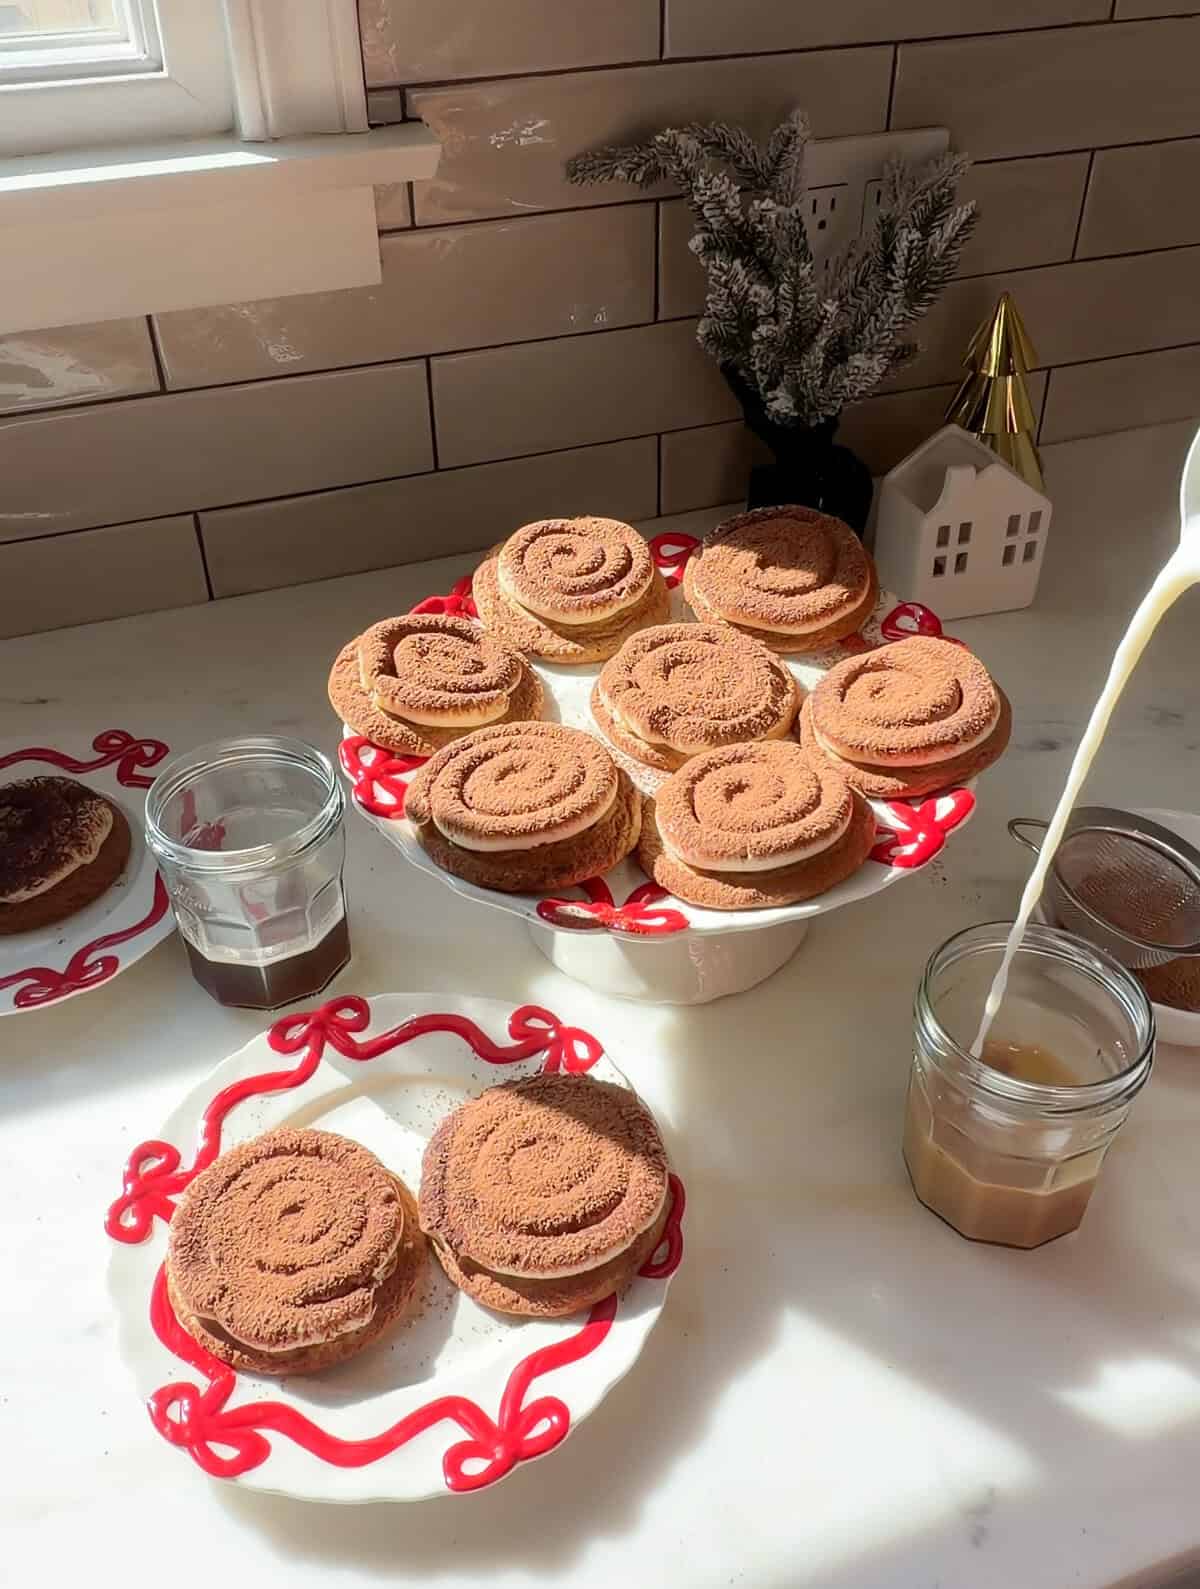
Sticky Toffee Pudding
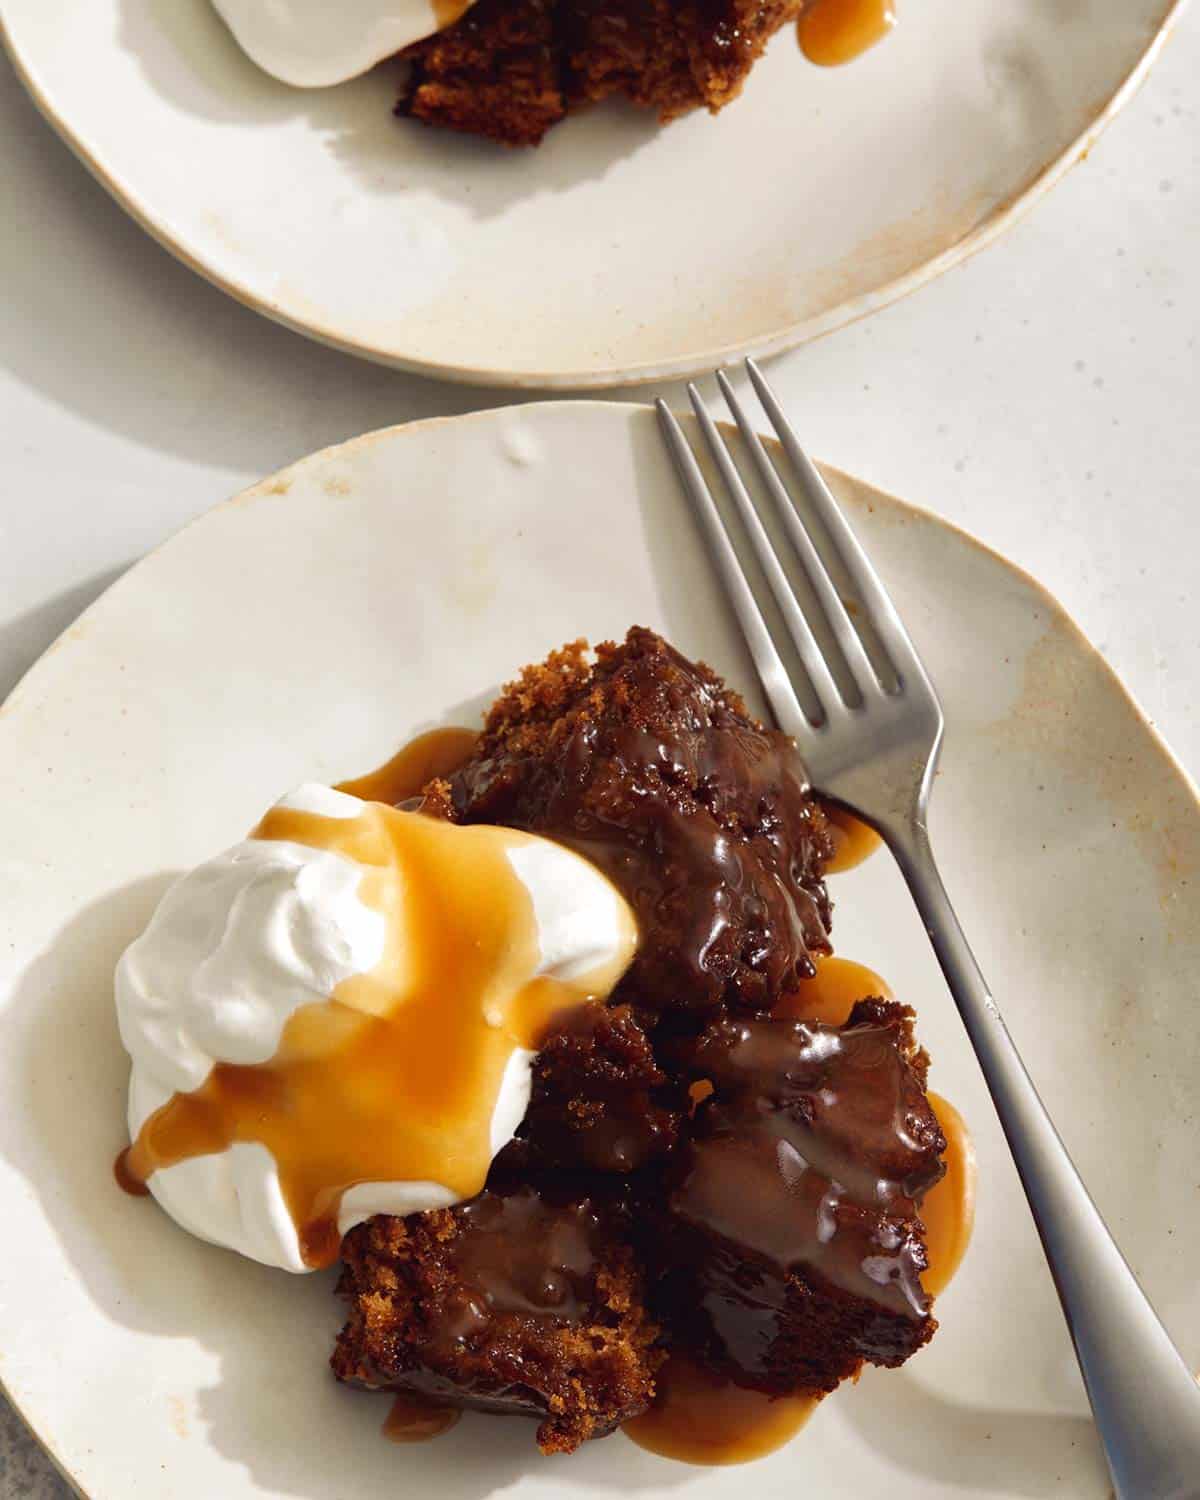
English Sticky Toffee Pudding is one of my top 3 favorite desserts of all time. I don’t think it gets enough love in the states and I wish that would change! I love it so much and this recipe is SO GOOD. It’s fluffy, moist and rich; plus the toffee sauce just takes it over the top. The lightly sweetened whipped cream adds a nice balance to the decadent pudding.
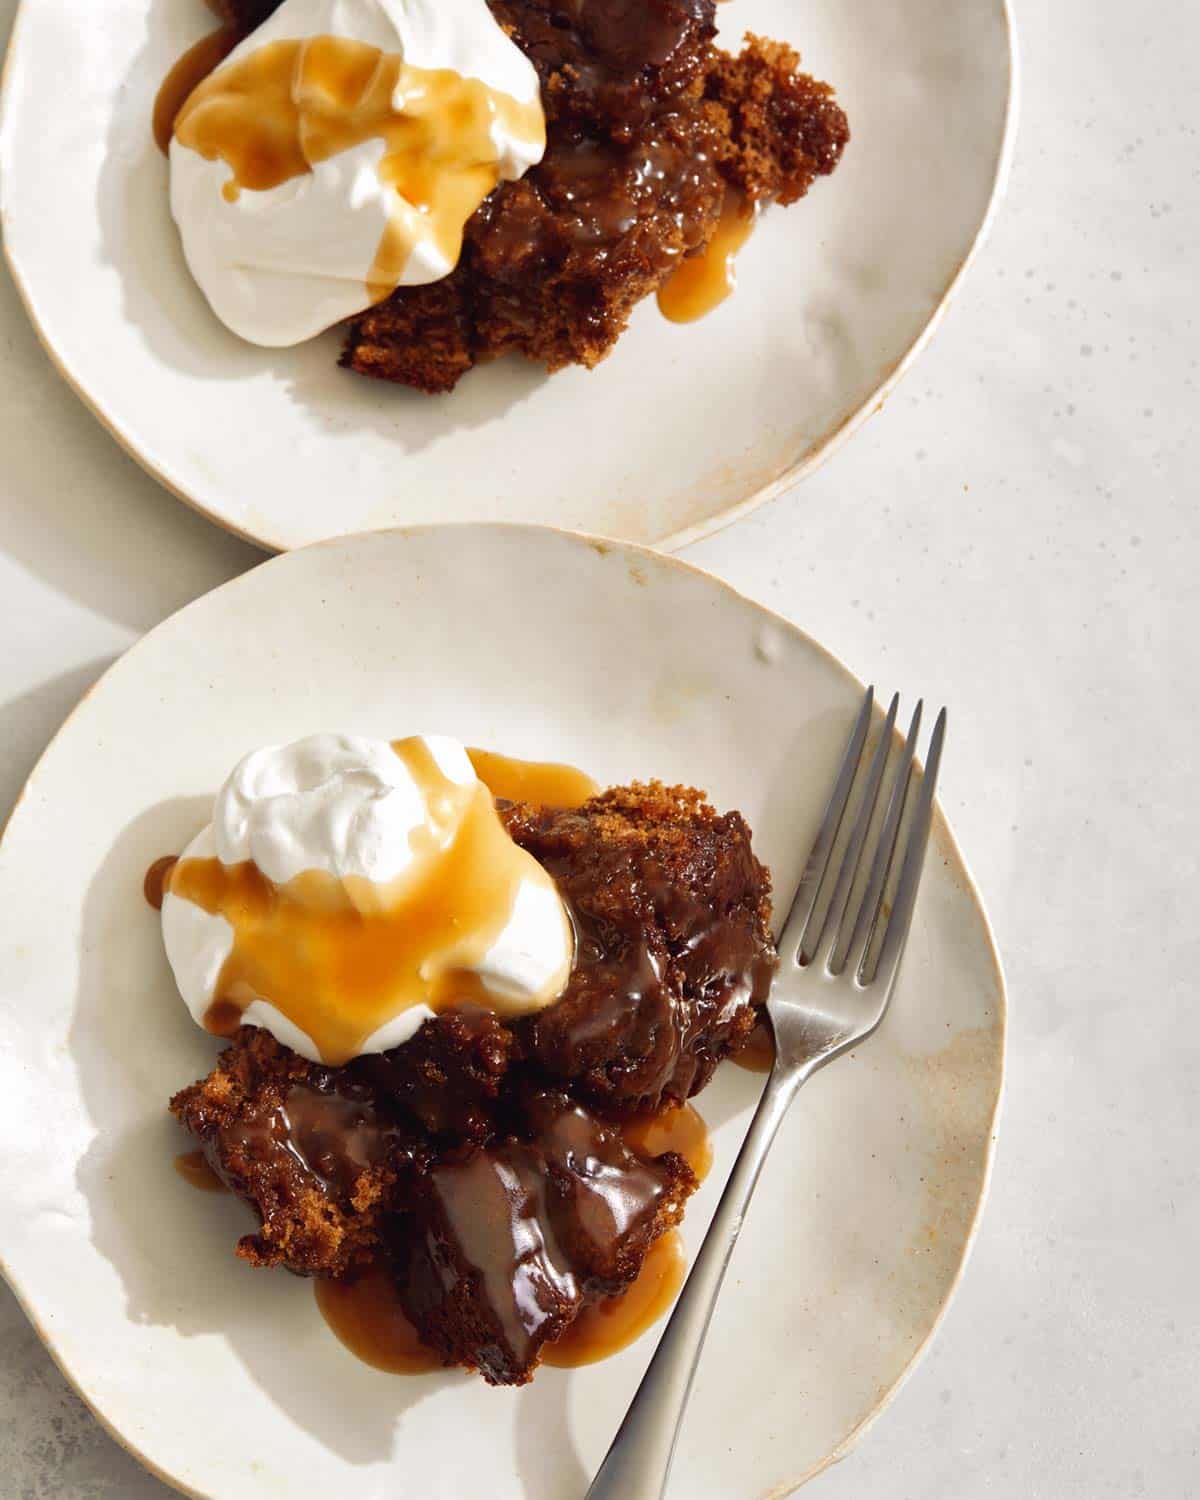
Our sticky toffee pudding recipe is a family-style version that feeds so it’s perfect for the holidays, if you’re trying to feed a group of people. It’s so cozy and satisfying!
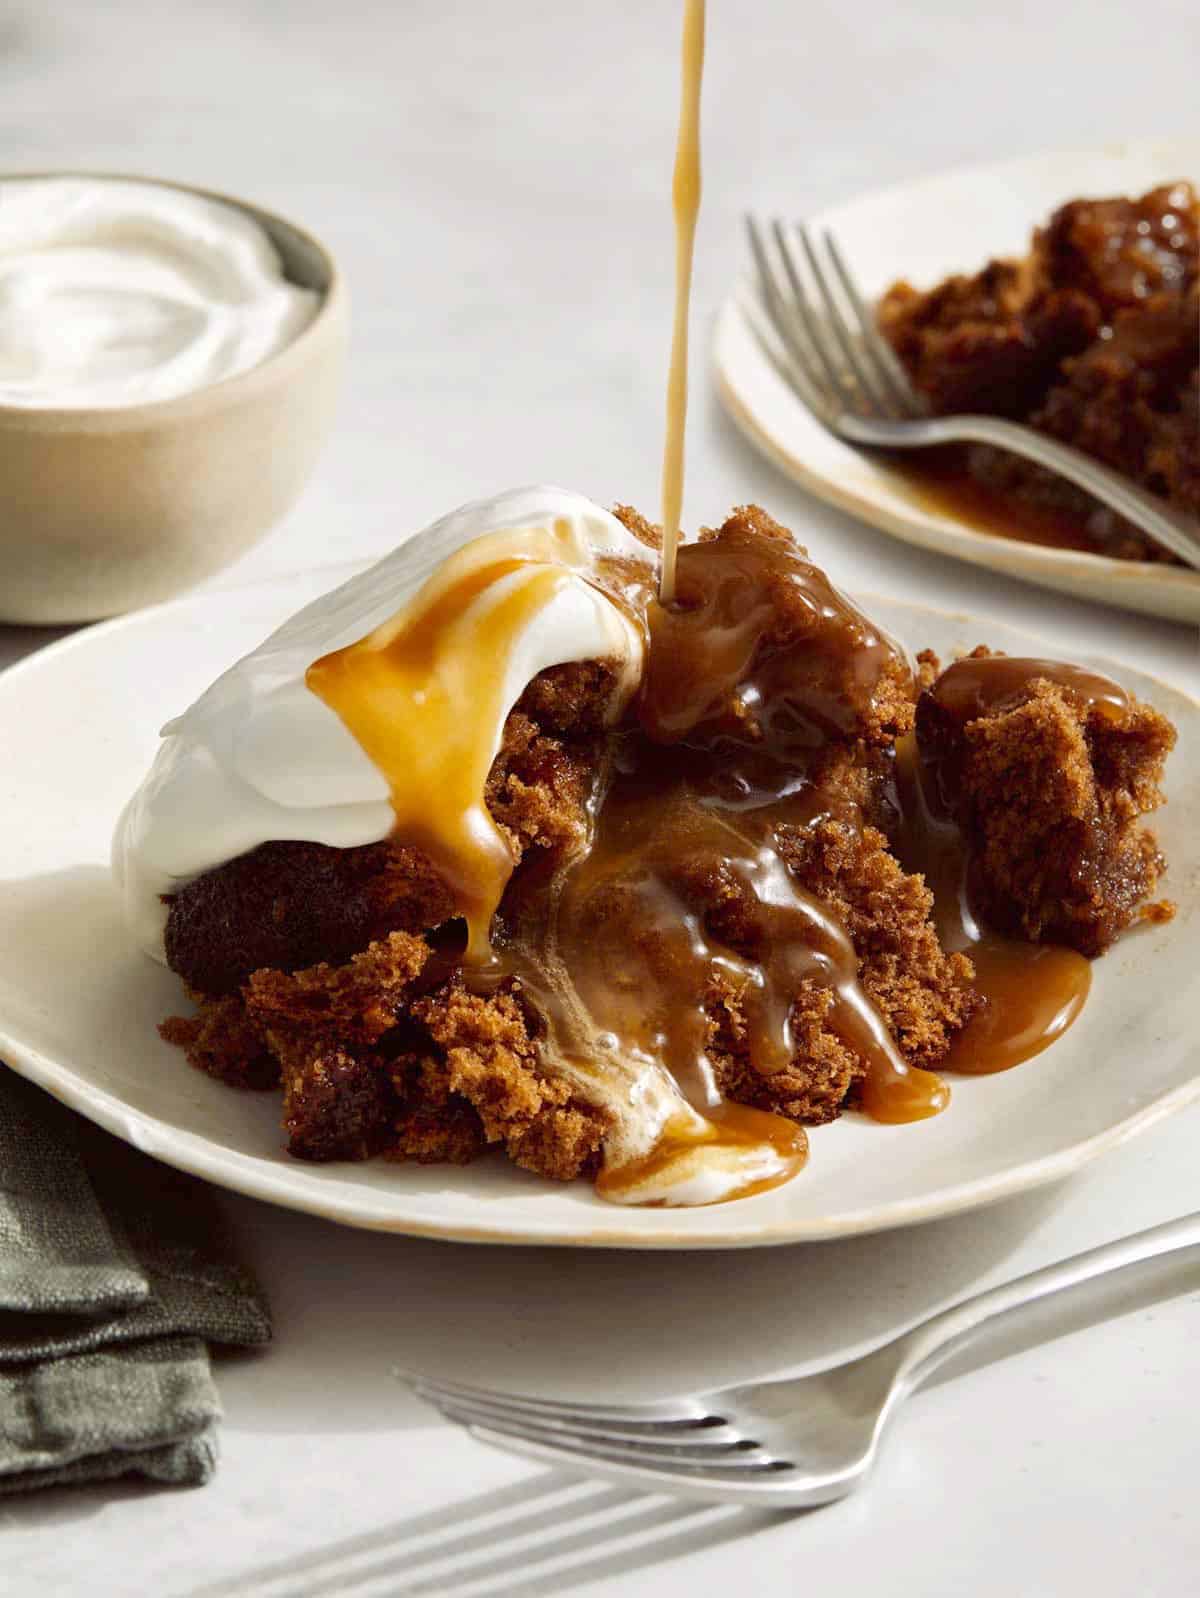
What is Sticky Toffee Pudding?
Sticky toffee pudding is a moist English cake made with dates and covered in rich toffee sauce. It’s also traditionally served with vanilla custard or ice cream. We serve ours with lightly sweetened whipped cream.
What Does Sticky Toffee Pudding Taste Like?
Sticky toffee pudding has a decadent, soft and almost chewy caramel/toffee flavor and texture.
Although many sticky toffee pudding recipes don’t call for a spice mixture, we include a small amount of cinnamon, clove and nutmeg into ours which adds a subtle depth of flavor that compliments the sweet richness.
How to Make Our Sticky Toffee Pudding Recipe
Ingredients
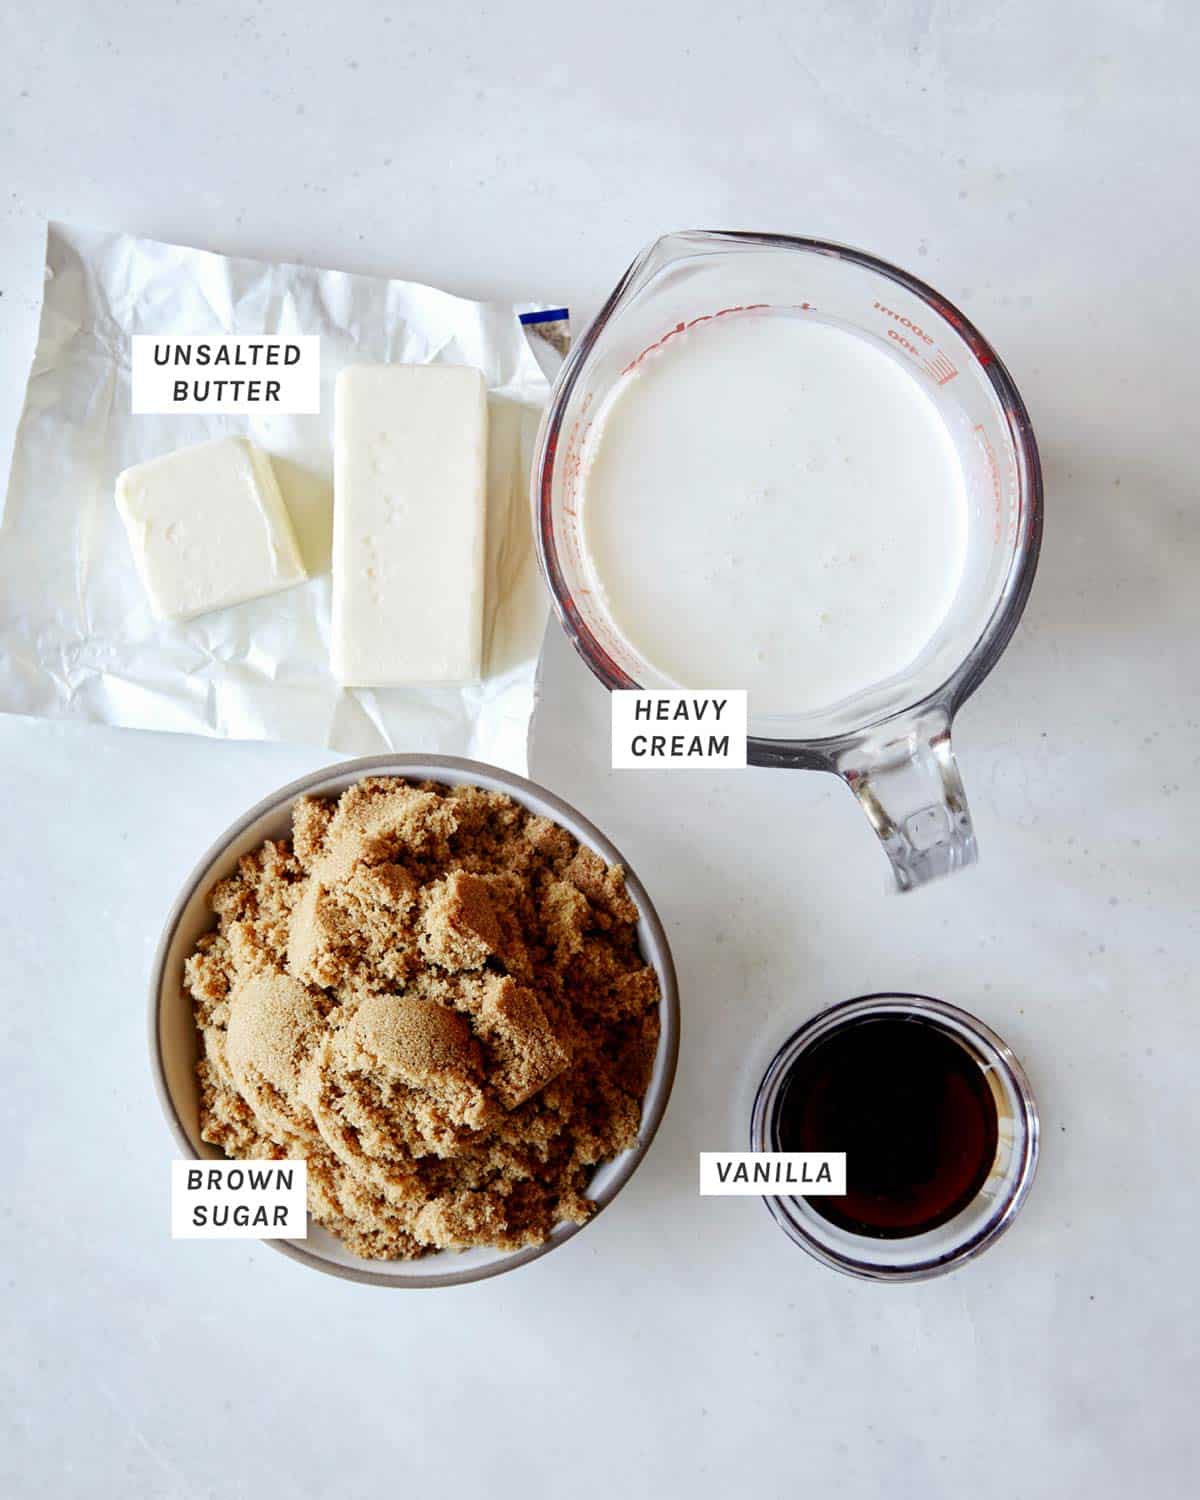
Toffee Sauce Ingredients
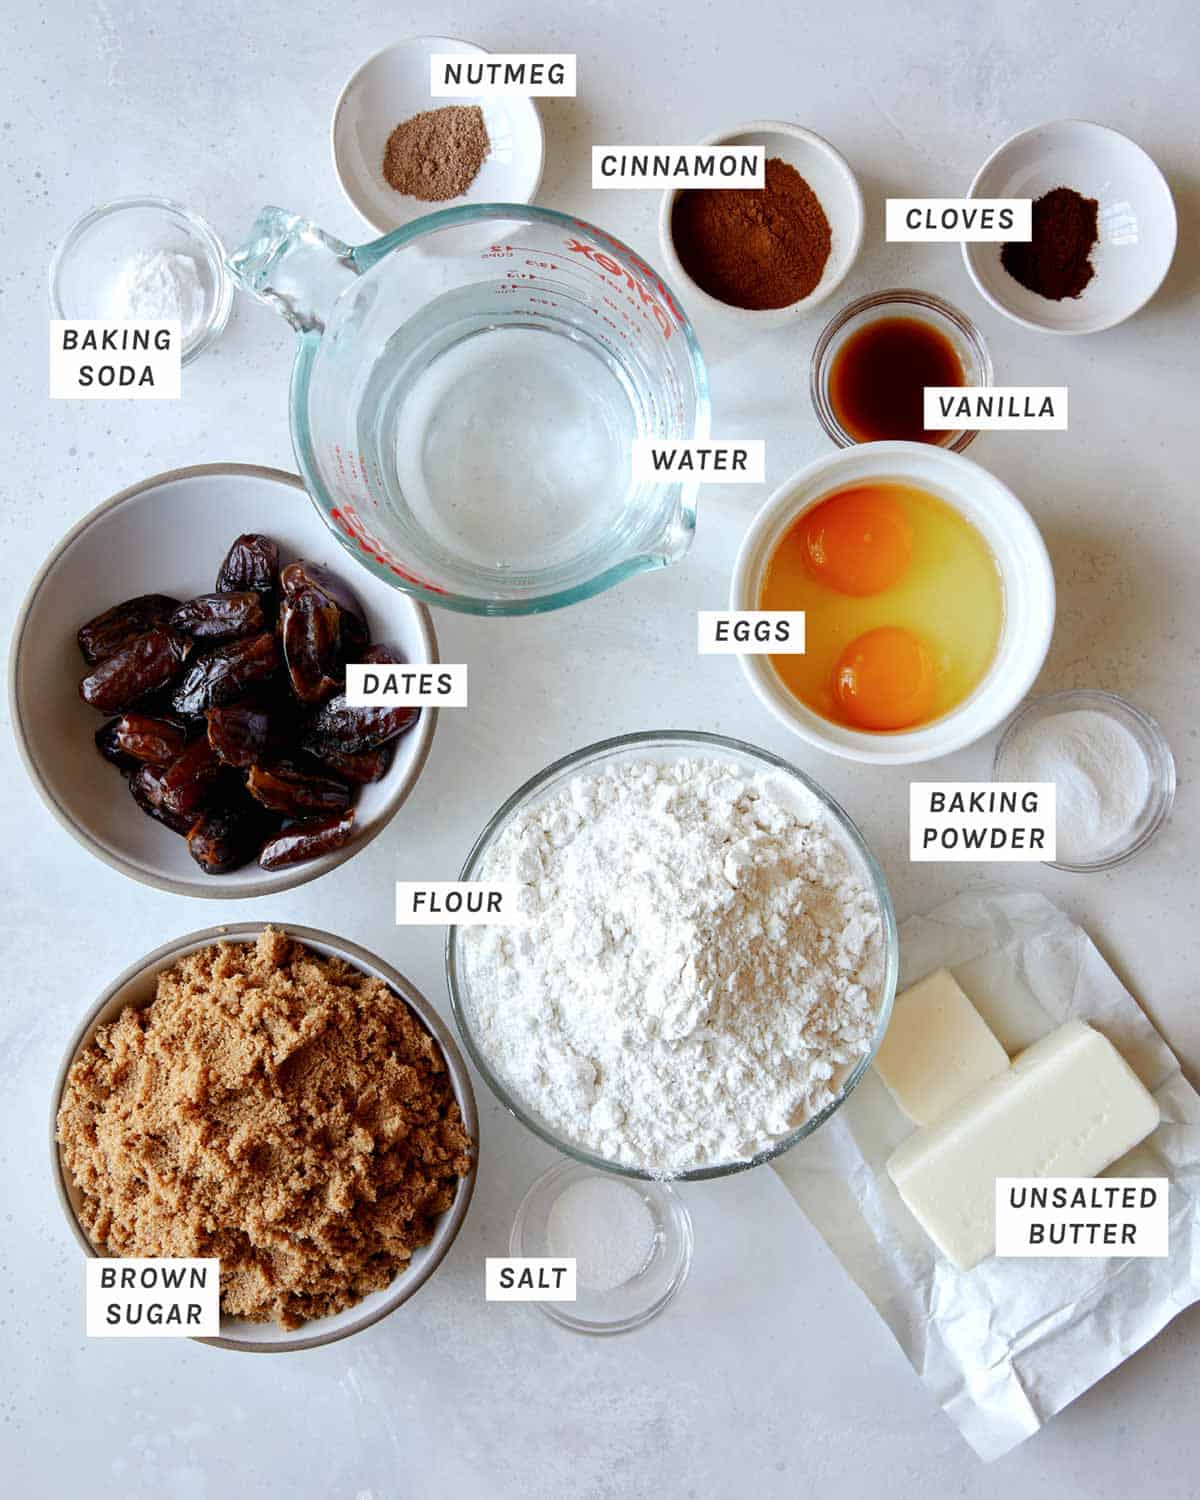
Pudding Ingredients
Whipped Cream Ingredients

Process
Toffee Sauce Process
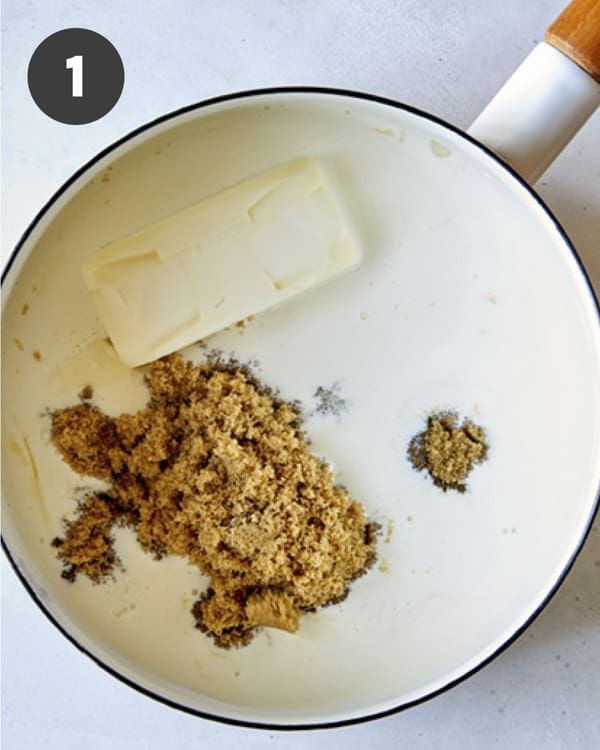
- Place all ingredients into saucepan. Stir together.
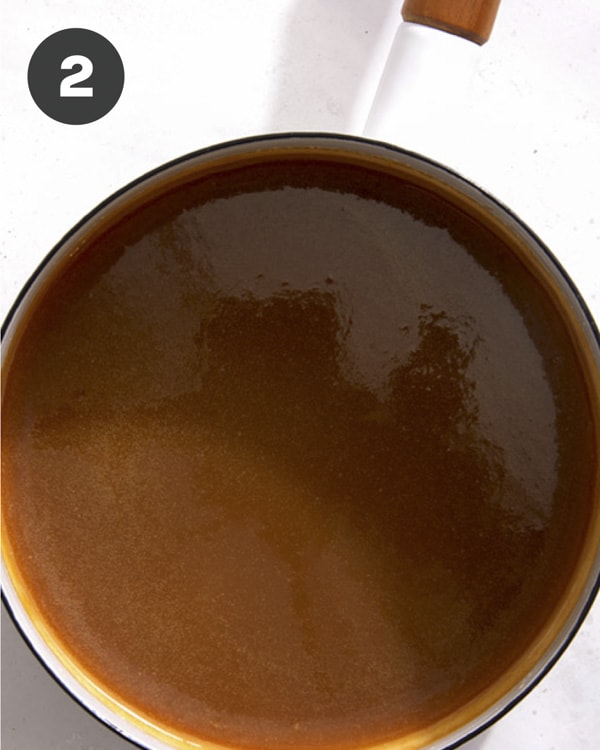
- Simmer until an amber sauce has formed and is thick enough to coat the back of a wooden spoon. Stir and remove from heat.
Pudding Process
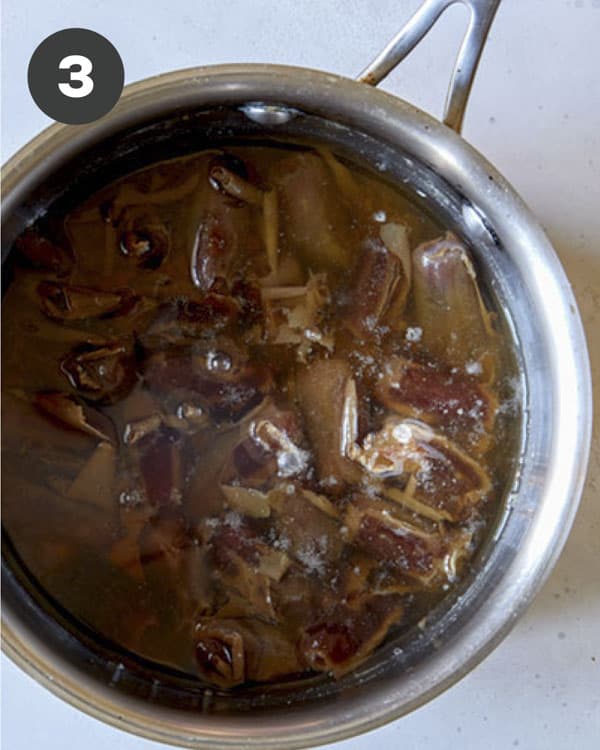
- Preheat oven to 350°F. Place dates and water in a saucepan and bring to a boil. Remove from heat and cool.
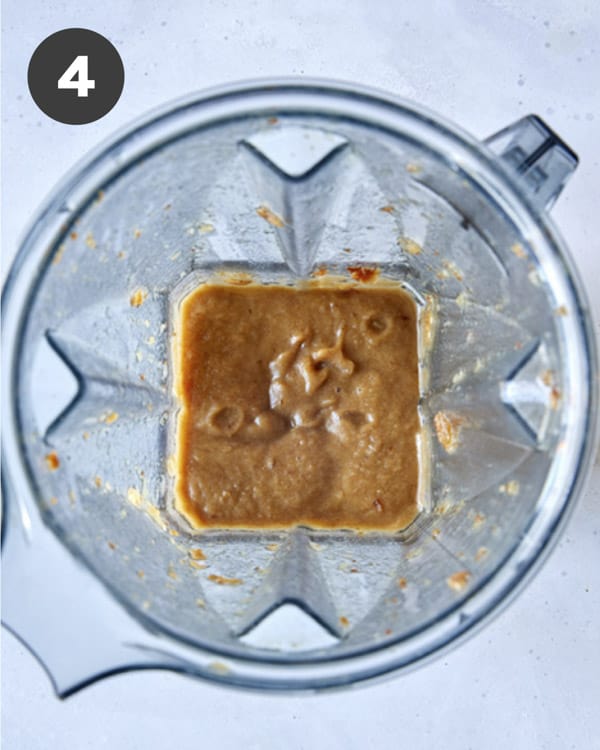
- Pour mixture into a blender and blend until smooth. Set aside.
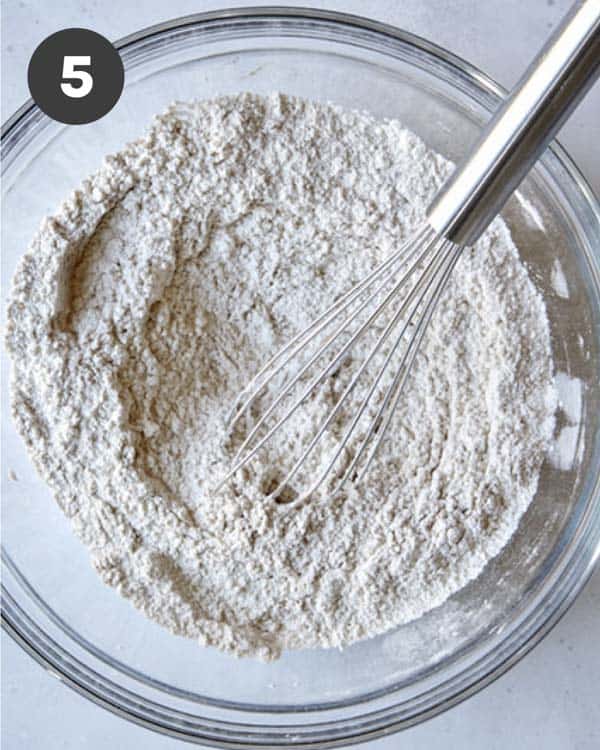
- In a mixing bowl combine flour, baking powder, baking soda, cinnamon, clove, nutmeg, and salt. Whisk together. Set aside.
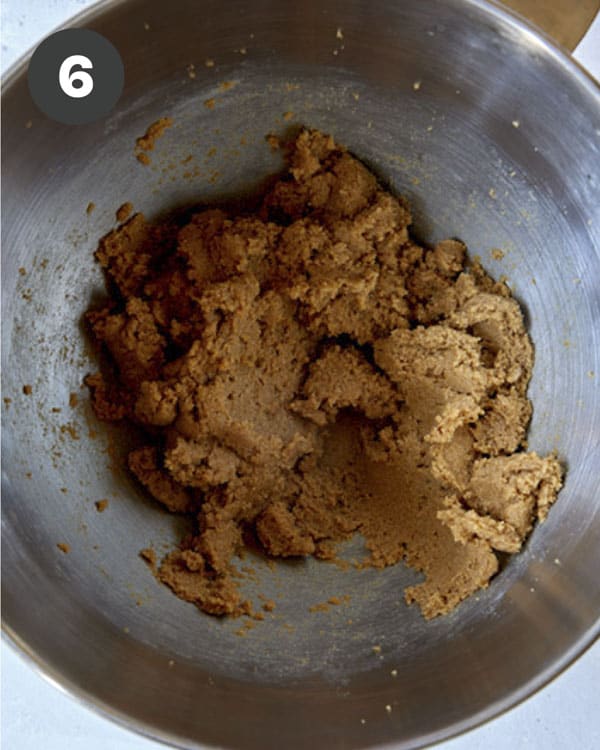
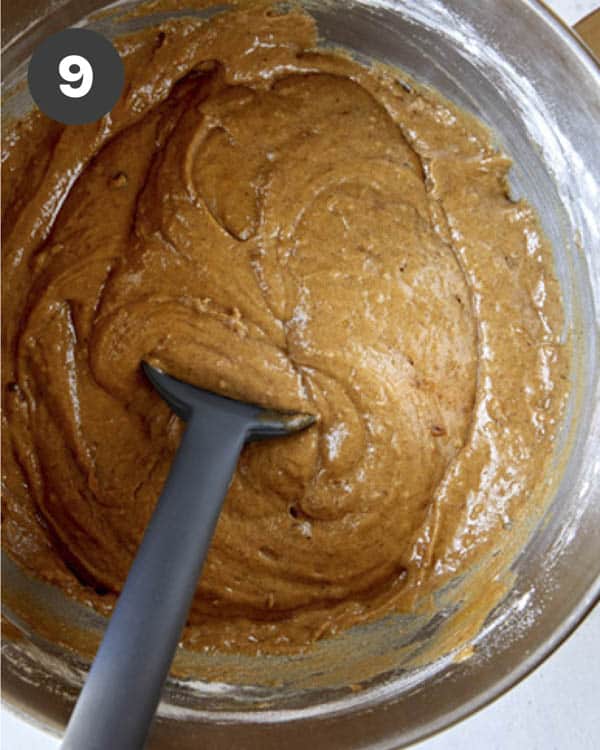
- In bowl of a stand mixer with a paddle attachment (or using a hand mixer), cream together the unsalted butter and brown sugar.
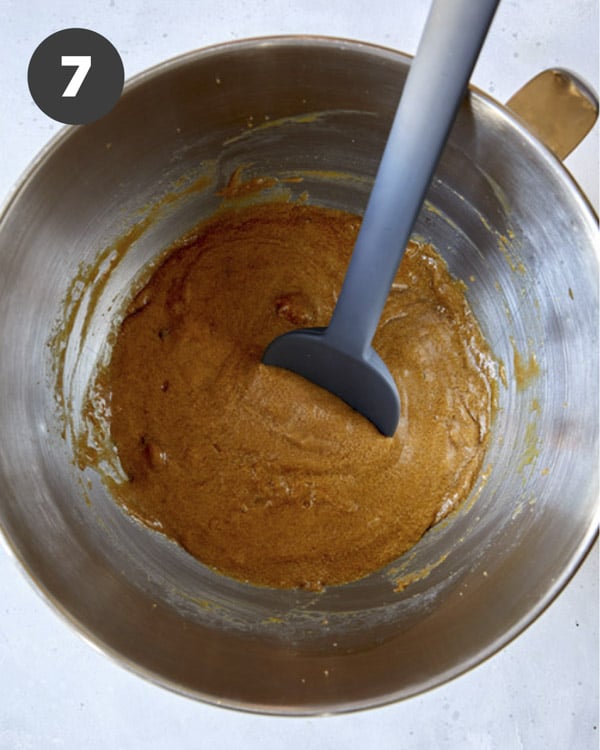
- Add eggs and continue to beat together.
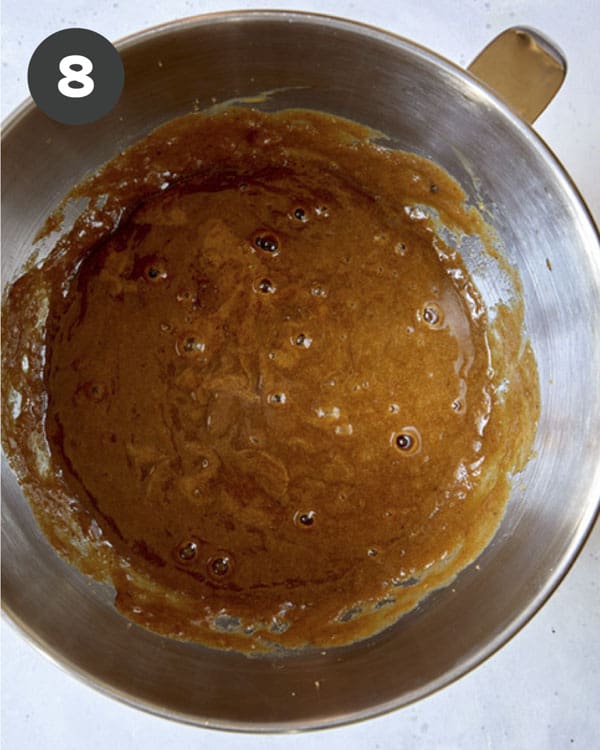
- Pour date puree and vanilla extract into butter mixture and beat until just incorporated.
- Add dry ingredients into wet ingredients and mix until fully combined.
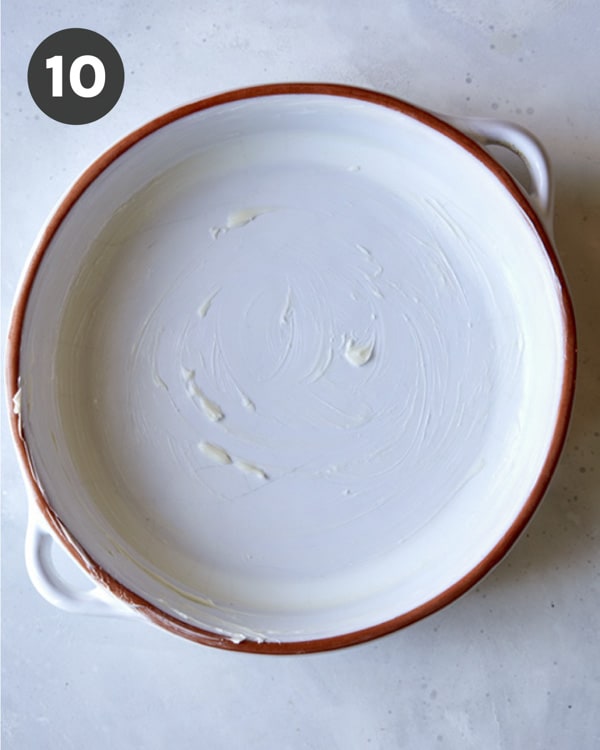
- Lightly grease a (2 quart) baking dish with butter.
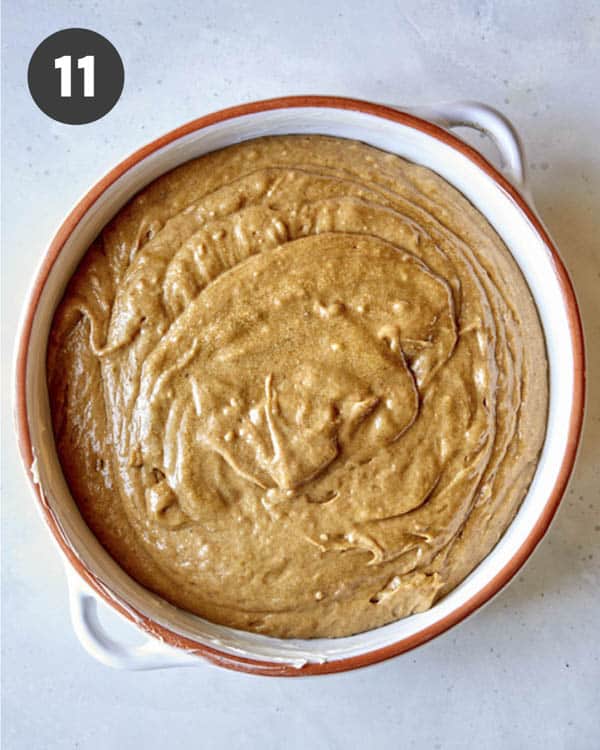
- Pour cake batter into prepared baking dish.
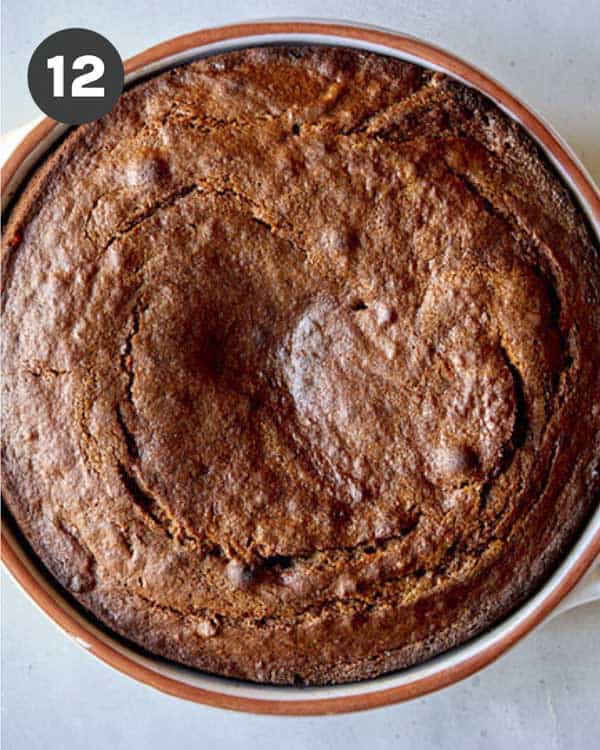
- Bake for about 30 to 35 minutes.Remove pudding from oven.
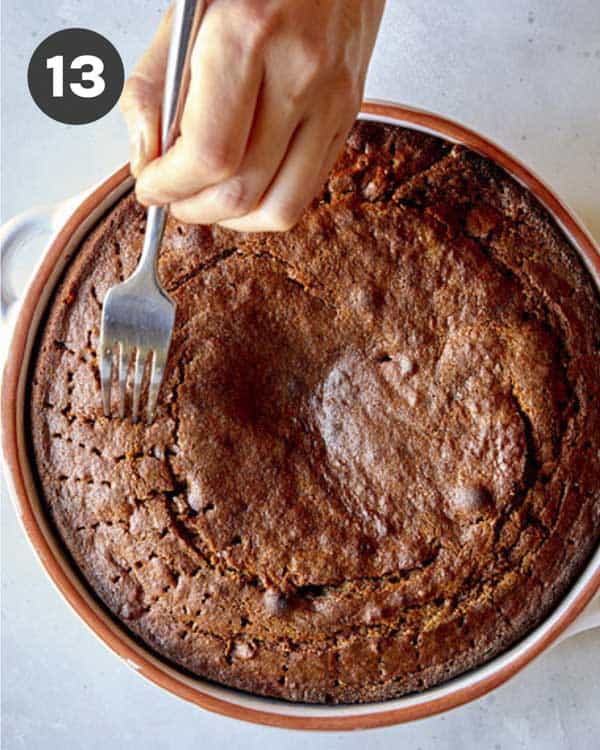
- Carefully prick the entire surface with a fork.
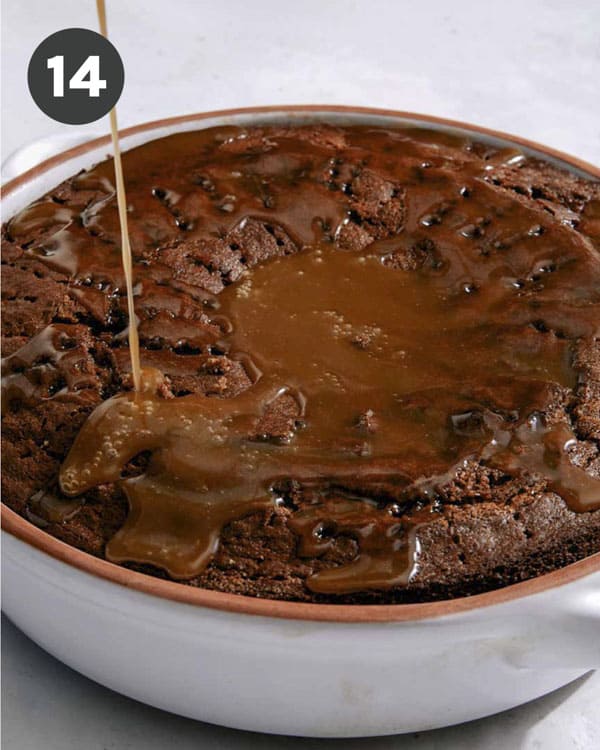
- Pour half the toffee sauce evenly over the top of pudding and allow sauce to slightly soak in.
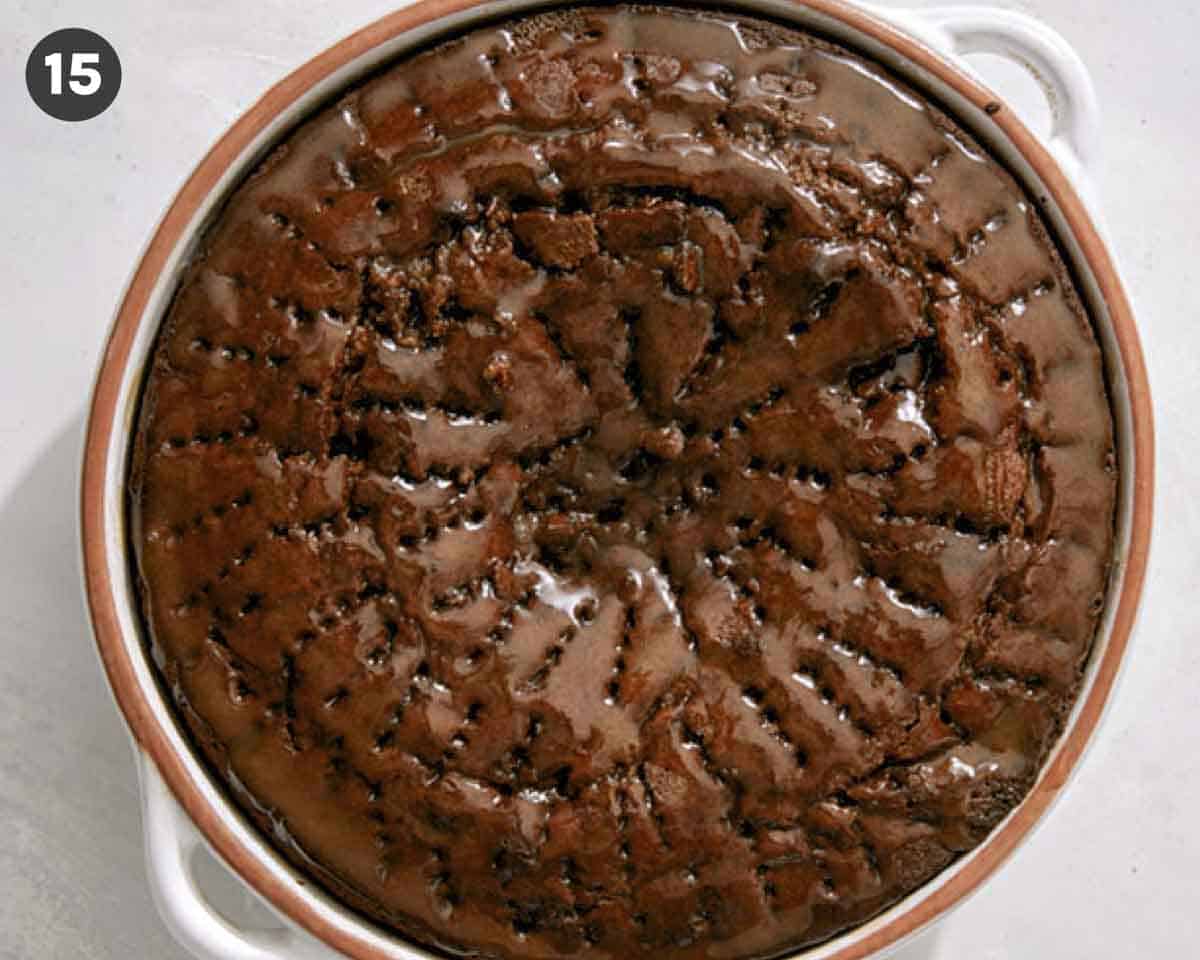
- Place the sticky toffee pudding back into the oven for 5 minutes, until the toffee sauce begins to bubble. Remove from oven and slightly cool.
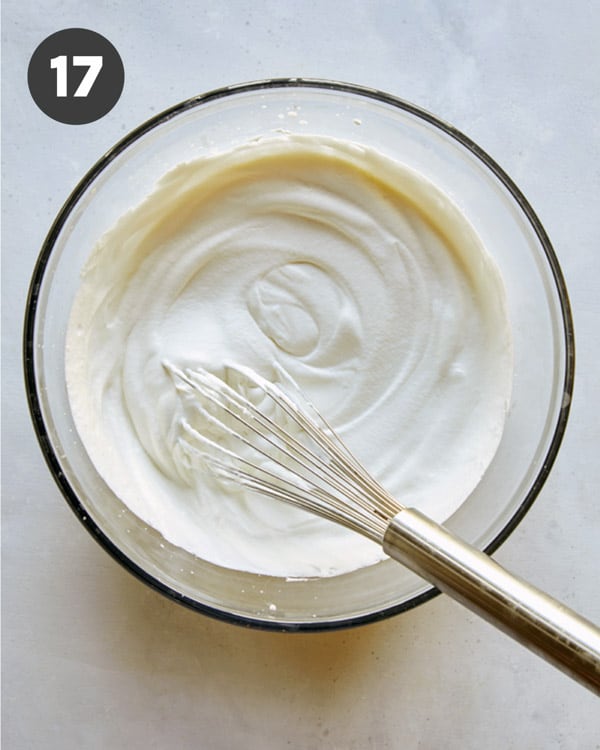
Whipped Cream Process
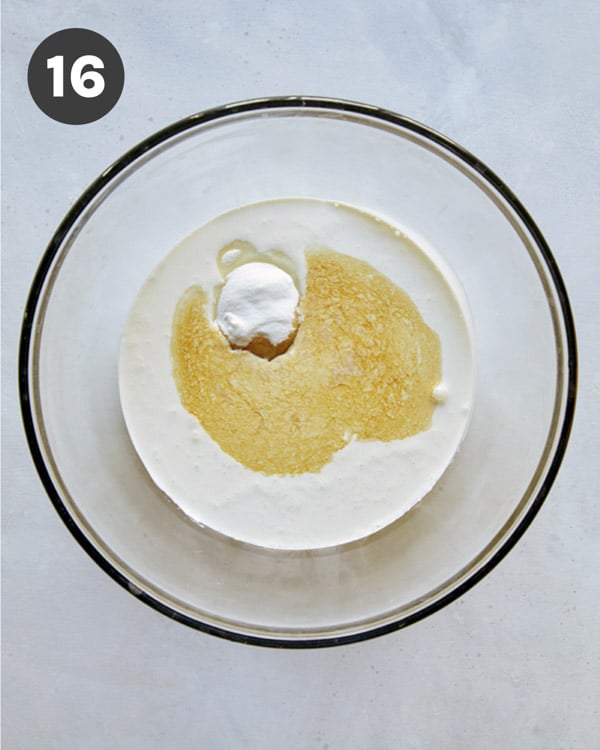
- Combine heavy cream, sugar and vanilla extract into a small bowl.
- Whisk together until a soft peaks form.
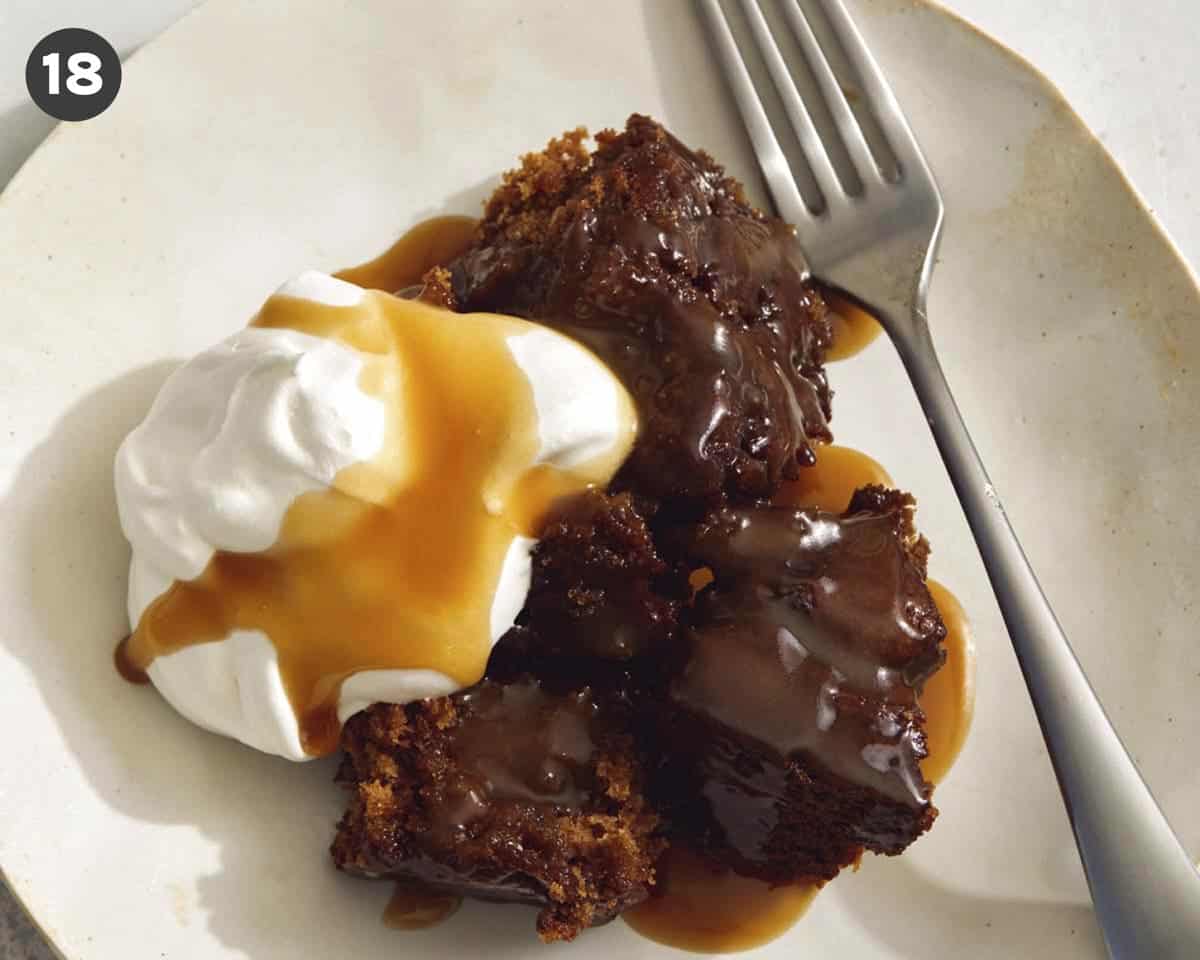
Assembly
- Scoop some pudding into a shallow bowl and top with a dollop of whipped cream. Finish with a drizzle of toffee sauce and serve.
Make Ahead and Freezing Sticky Toffee Pudding
Although this sticky toffee pudding is best enjoyed the day it’s made, it can be made ahead of time as well as frozen!
Make Ahead
- Toffee sauce can be made up to 2 weeks ahead of time and stored in an airtight container in the refrigerator. To reheat, pour sauce into saucepan and simmer over low heat just until heated through.
- Pudding can be made up to 3 days ahead of time. Cool completely from oven and tightly wrap with plastic wrap and store in the refrigerator. To reheat, uncover and heat in an oven until just warmed. Prick surface with fork and top with half the warmed toffee sauce. Place pudding back into oven for 10 minutes. Serve.
- Whipped Cream should not be made ahead of time and should be used the day it is made.
Freezing
- Toffee sauce can be frozen for up to 3 months. Store sauce in an airtight container in the freezer. To reheat, thaw sauce in the refrigerator overnight. Once thawed, pour sauce into a small saucepan and gently simmer until heated through.
- Pudding can be frozen for up to 3 months. Cool pudding completely from oven and tightly wrap with plastic wrap and store in the freezer. To reheat, thaw in the refrigerator overnight. Once thawed, uncover and heat in an oven until just warmed. Prick surface with fork and top with half the warmed toffee sauce. Place pudding back into oven for 10 minutes. Serve.
Variations
- The cinnamon, clove and nutmeg spices can be adjusted to preferred taste or even omitted all together and still result in a delicious, sweet pudding.
- Add a subtle chocolatey flavor by incorporating a small amount of unsweetened cocoa powder to the batter.
- Fold a few tablespoons of the toffee sauce into the whipped cream for a toffee flavored whipped cream!
- Serve the sticky toffee pudding with vanilla ice cream instead of whipped cream, to make it a la mode!
- Make individual portions of our recipe by pouring the batter into small ramekins (about 6 ounces in size). Just decrease the baking time by about 8-10 minutes.
More Crowd Pleasing Dessert Recipes You Will Love


Sticky Toffee Pudding
Equipment
- 1 blender
Ingredients
- 1/2 cup (1 stick) unsalted butter, softened
- 24 dates, pitted and chopped (5 ounces)
- 1 1/2 cups water
- 1 1/2 cups dark brown sugar
- 1 1/2 teaspoons vanilla extract
- 2 eggs
- 1 3/4 cups all purpose flour
- 2 teaspoons baking powder
- 1/2 teaspoon baking soda
- 1 teaspoon cinnamon
- 1/4 teaspoon ground cloves
- 1/4 teaspoon ground nutmeg
- ¼ teaspoon salt
toffee sauce
- 3/4 cup unsalted butter, softened
- 1 1/2 cups dark brown sugar
- 1 1/2 cups heavy cream
- 1 1/2 teaspoons vanilla extract
sweet cream
- 1 1/2 cups heavy cream
- 1/2 cup sugar
- 1/2 teaspoon vanilla extract
Instructions
toffee sauce
- Place all toffee sauce ingredients into a saucepan and gently stir together. Simmer over medium heat until an amber sauce has formed and is thick enough to coat the back of a wooden spoon, about 10 minutes. Stir and remove from heat.
pudding
- Preheat oven to 350°F.
- Place dates and water in a small pot and bring to a boil. Remove from heat and set aside. Cool for 15 minutes.
- Pour mixture into a blender and blend until smooth. Set aside.
- In a mixing bowl combine flour, baking powder, baking soda, cinnamon, clove, nutmeg, and salt and whisk together. Set aside.
- In bowl of a stand mixer with a paddle attachment (or using a hand mixer), cream together the butter and sugar.
- Scrape down sides of the bowl and add egg, one at a time, continue to beat together.
- Add date puree and vanilla into butter mixture and beat together until just incorporated.
- Add dry ingredients into wet ingredients and mix until fully combined.
- Pour mixture into a lightly greased (2 quart) baking dish and bake for about 30 to 35 minutes or until a toothpick comes out clean when inserted into the center of the pudding.
- Remove pudding from oven and carefully prick the entire surface with a fork.
- Pour half the toffee sauce evenly over the top of pudding and allow sauce to slightly soak in.
- Place the sticky toffee pudding back into the oven for 5 minutes, until the toffee sauce begins to bubble. Remove from oven and slightly cool.
whipped cream
- Place all the ingredients into a small bowl and whisk together until a soft peaks form.
assemble
- Scoop some pudding into a shallow bowl and top with a dollop of whipped cream. Finish with a drizzle of toffee sauce and serve.
Video
Notes
- Toffee sauce can be made up to 2 weeks ahead of time and stored in an airtight container in the refrigerator. To reheat, pour sauce into saucepan and simmer over low heat just until heated through.
- Pudding can be made up to 3 days ahead of time. Cool completely from oven and tightly wrap with plastic wrap and store in the refrigerator. To reheat, uncover and heat in an oven until just warmed. Prick surface with fork and top with half the warmed toffee sauce. Place pudding back into oven for 10 minutes. Serve.
- Whipped Cream should not be made ahead of time and should be used the day it is made.
- Toffee sauce can be frozen for up to 3 months. Store sauce in an airtight container in the freezer. To reheat, thaw sauce in the refrigerator overnight. Once thawed, pour sauce into a small saucepan and gently simmer until heated through.
- Pudding can be frozen for up to 3 months. Cool pudding completely from oven and tightly wrap with plastic wrap and store in the freezer. To reheat, thaw in the refrigerator overnight. Once thawed, uncover and heat in an oven until just warmed. Prick surface with fork and top with half the warmed toffee sauce. Place pudding back into oven for 10 minutes. Serve.
Nutrition
The post Sticky Toffee Pudding appeared first on Spoon Fork Bacon.
Sticky Toffee Pudding
English Sticky Toffee Pudding is one of my top 3 favorite desserts of all time. I don’t think it gets enough love in the states and I wish that would change! I love it so much and this recipe is SO GOOD. It’s fluffy, moist and rich; plus the toffee sauce just takes it over the top. The lightly sweetened whipped cream adds a nice balance to the decadent pudding.
Our sticky toffee pudding recipe is a family-style version that feeds so it’s perfect for the holidays, if you’re trying to feed a group of people. It’s so cozy and satisfying!
What is Sticky Toffee Pudding?
Sticky toffee pudding is a moist English cake made with dates and covered in rich toffee sauce. It’s also traditionally served with vanilla custard or ice cream. We serve ours with lightly sweetened whipped cream.
What Does Sticky Toffee Pudding Taste Like?
Sticky toffee pudding has a decadent, soft and almost chewy caramel/toffee flavor and texture.
Although many sticky toffee pudding recipes don’t call for a spice mixture, we include a small amount of cinnamon, clove and nutmeg into ours which adds a subtle depth of flavor that compliments the sweet richness.
How to Make Our Sticky Toffee Pudding Recipe
Ingredients
Toffee Sauce Ingredients
Pudding Ingredients
Whipped Cream Ingredients
Process
Toffee Sauce Process
- Place all ingredients into saucepan. Stir together.
- Simmer until an amber sauce has formed and is thick enough to coat the back of a wooden spoon. Stir and remove from heat.
Pudding Process
- Preheat oven to 350°F. Place dates and water in a saucepan and bring to a boil. Remove from heat and cool.
- Pour mixture into a blender and blend until smooth. Set aside.
- In a mixing bowl combine flour, baking powder, baking soda, cinnamon, clove, nutmeg, and salt. Whisk together. Set aside.
- In bowl of a stand mixer with a paddle attachment (or using a hand mixer), cream together the unsalted butter and brown sugar.
- Add eggs and continue to beat together.
- Pour date puree and vanilla extract into butter mixture and beat until just incorporated.
- Add dry ingredients into wet ingredients and mix until fully combined.
- Lightly grease a (2 quart) baking dish with butter.
- Pour cake batter into prepared baking dish.
- Bake for about 30 to 35 minutes.Remove pudding from oven.
- Carefully prick the entire surface with a fork.
- Pour half the toffee sauce evenly over the top of pudding and allow sauce to slightly soak in.
- Place the sticky toffee pudding back into the oven for 5 minutes, until the toffee sauce begins to bubble. Remove from oven and slightly cool.
Whipped Cream Process
- Combine heavy cream, sugar and vanilla extract into a small bowl.
- Whisk together until a soft peaks form.
Assembly
- Scoop some pudding into a shallow bowl and top with a dollop of whipped cream. Finish with a drizzle of toffee sauce and serve.
Make Ahead and Freezing Sticky Toffee Pudding
Although this sticky toffee pudding is best enjoyed the day it’s made, it can be made ahead of time as well as frozen!
Make Ahead
- Toffee sauce can be made up to 2 weeks ahead of time and stored in an airtight container in the refrigerator. To reheat, pour sauce into saucepan and simmer over low heat just until heated through.
- Pudding can be made up to 3 days ahead of time. Cool completely from oven and tightly wrap with plastic wrap and store in the refrigerator. To reheat, uncover and heat in an oven until just warmed. Prick surface with fork and top with half the warmed toffee sauce. Place pudding back into oven for 10 minutes. Serve.
- Whipped Cream should not be made ahead of time and should be used the day it is made.
Freezing
- Toffee sauce can be frozen for up to 3 months. Store sauce in an airtight container in the freezer. To reheat, thaw sauce in the refrigerator overnight. Once thawed, pour sauce into a small saucepan and gently simmer until heated through.
- Pudding can be frozen for up to 3 months. Cool pudding completely from oven and tightly wrap with plastic wrap and store in the freezer. To reheat, thaw in the refrigerator overnight. Once thawed, uncover and heat in an oven until just warmed. Prick surface with fork and top with half the warmed toffee sauce. Place pudding back into oven for 10 minutes. Serve.
Variations
- The cinnamon, clove and nutmeg spices can be adjusted to preferred taste or even omitted all together and still result in a delicious, sweet pudding.
- Add a subtle chocolatey flavor by incorporating a small amount of unsweetened cocoa powder to the batter.
- Fold a few tablespoons of the toffee sauce into the whipped cream for a toffee flavored whipped cream!
- Serve the sticky toffee pudding with vanilla ice cream instead of whipped cream, to make it a la mode!
- Make individual portions of our recipe by pouring the batter into small ramekins (about 6 ounces in size). Just decrease the baking time by about 8-10 minutes.
More Crowd Pleasing Dessert Recipes You Will Love
Sticky Toffee Pudding
Equipment
- 1 blender
Ingredients
- 1/2 cup (1 stick) unsalted butter, softened
- 24 dates, pitted and chopped (5 ounces)
- 1 1/2 cups water
- 1 1/2 cups dark brown sugar
- 1 1/2 teaspoons vanilla extract
- 2 eggs
- 1 3/4 cups all purpose flour
- 2 teaspoons baking powder
- 1/2 teaspoon baking soda
- 1 teaspoon cinnamon
- 1/4 teaspoon ground cloves
- 1/4 teaspoon ground nutmeg
- ¼ teaspoon salt
toffee sauce
- 3/4 cup unsalted butter, softened
- 1 1/2 cups dark brown sugar
- 1 1/2 cups heavy cream
- 1 1/2 teaspoons vanilla extract
sweet cream
- 1 1/2 cups heavy cream
- 1/2 cup sugar
- 1/2 teaspoon vanilla extract
Instructions
toffee sauce
- Place all toffee sauce ingredients into a saucepan and gently stir together. Simmer over medium heat until an amber sauce has formed and is thick enough to coat the back of a wooden spoon, about 10 minutes. Stir and remove from heat.
pudding
- Preheat oven to 350°F.
- Place dates and water in a small pot and bring to a boil. Remove from heat and set aside. Cool for 15 minutes.
- Pour mixture into a blender and blend until smooth. Set aside.
- In a mixing bowl combine flour, baking powder, baking soda, cinnamon, clove, nutmeg, and salt and whisk together. Set aside.
- In bowl of a stand mixer with a paddle attachment (or using a hand mixer), cream together the butter and sugar.
- Scrape down sides of the bowl and add egg, one at a time, continue to beat together.
- Add date puree and vanilla into butter mixture and beat together until just incorporated.
- Add dry ingredients into wet ingredients and mix until fully combined.
- Pour mixture into a lightly greased (2 quart) baking dish and bake for about 30 to 35 minutes or until a toothpick comes out clean when inserted into the center of the pudding.
- Remove pudding from oven and carefully prick the entire surface with a fork.
- Pour half the toffee sauce evenly over the top of pudding and allow sauce to slightly soak in.
- Place the sticky toffee pudding back into the oven for 5 minutes, until the toffee sauce begins to bubble. Remove from oven and slightly cool.
whipped cream
- Place all the ingredients into a small bowl and whisk together until a soft peaks form.
assemble
- Scoop some pudding into a shallow bowl and top with a dollop of whipped cream. Finish with a drizzle of toffee sauce and serve.
Video
Notes
- Toffee sauce can be made up to 2 weeks ahead of time and stored in an airtight container in the refrigerator. To reheat, pour sauce into saucepan and simmer over low heat just until heated through.
- Pudding can be made up to 3 days ahead of time. Cool completely from oven and tightly wrap with plastic wrap and store in the refrigerator. To reheat, uncover and heat in an oven until just warmed. Prick surface with fork and top with half the warmed toffee sauce. Place pudding back into oven for 10 minutes. Serve.
- Whipped Cream should not be made ahead of time and should be used the day it is made.
- Toffee sauce can be frozen for up to 3 months. Store sauce in an airtight container in the freezer. To reheat, thaw sauce in the refrigerator overnight. Once thawed, pour sauce into a small saucepan and gently simmer until heated through.
- Pudding can be frozen for up to 3 months. Cool pudding completely from oven and tightly wrap with plastic wrap and store in the freezer. To reheat, thaw in the refrigerator overnight. Once thawed, uncover and heat in an oven until just warmed. Prick surface with fork and top with half the warmed toffee sauce. Place pudding back into oven for 10 minutes. Serve.
Nutrition
The post Sticky Toffee Pudding appeared first on Spoon Fork Bacon.
Penric audio news
General release is scheduled for February 14, 2026:
https://www.downpour.com/products/boo...
And at all the usual suspects/online vendors. Happy Valentine's?
In addition, Audible has an earlier release on December 16th.
https://www.amazon.com/Testimony-Mute...
I've no idea why Audible gets a 2-month exclusive head start; business matters I expect. It was the same for "Demonic Ox".
At any rate, "Coming Soon!" is roughly true.
Ta, L.
posted by Lois McMaster Bujold on November, 30
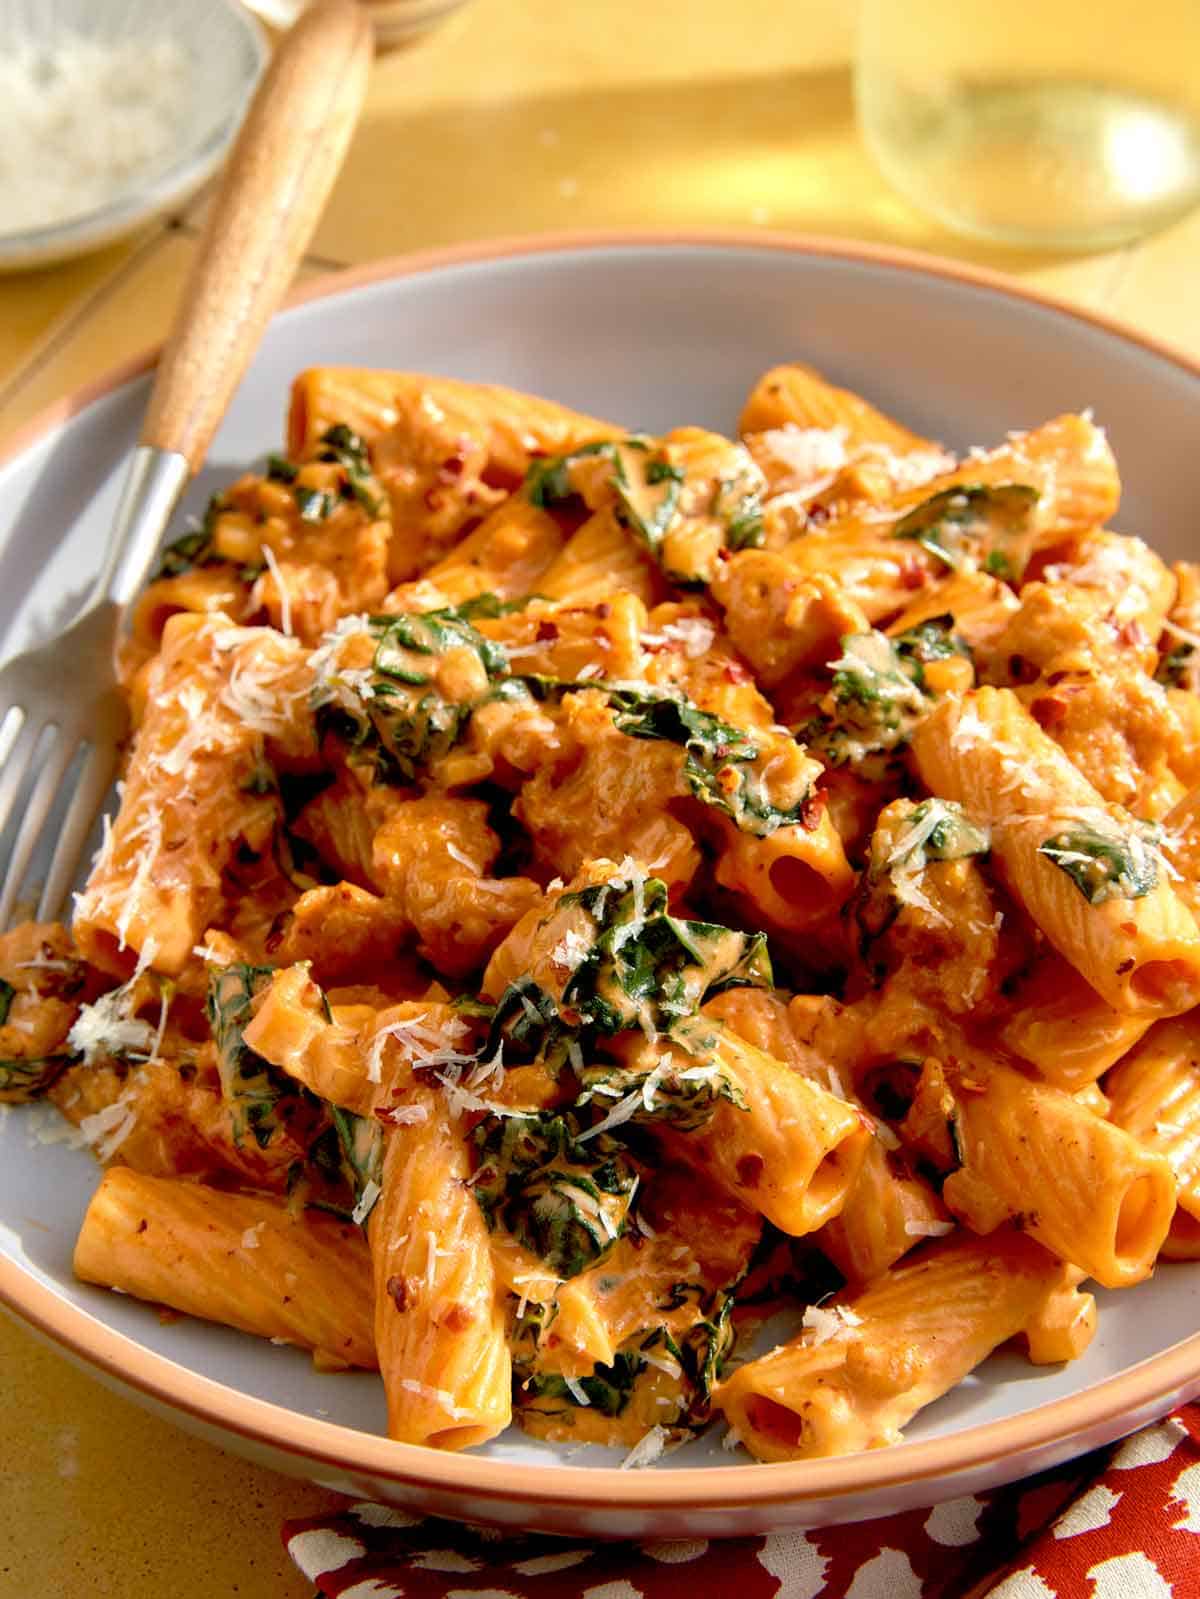
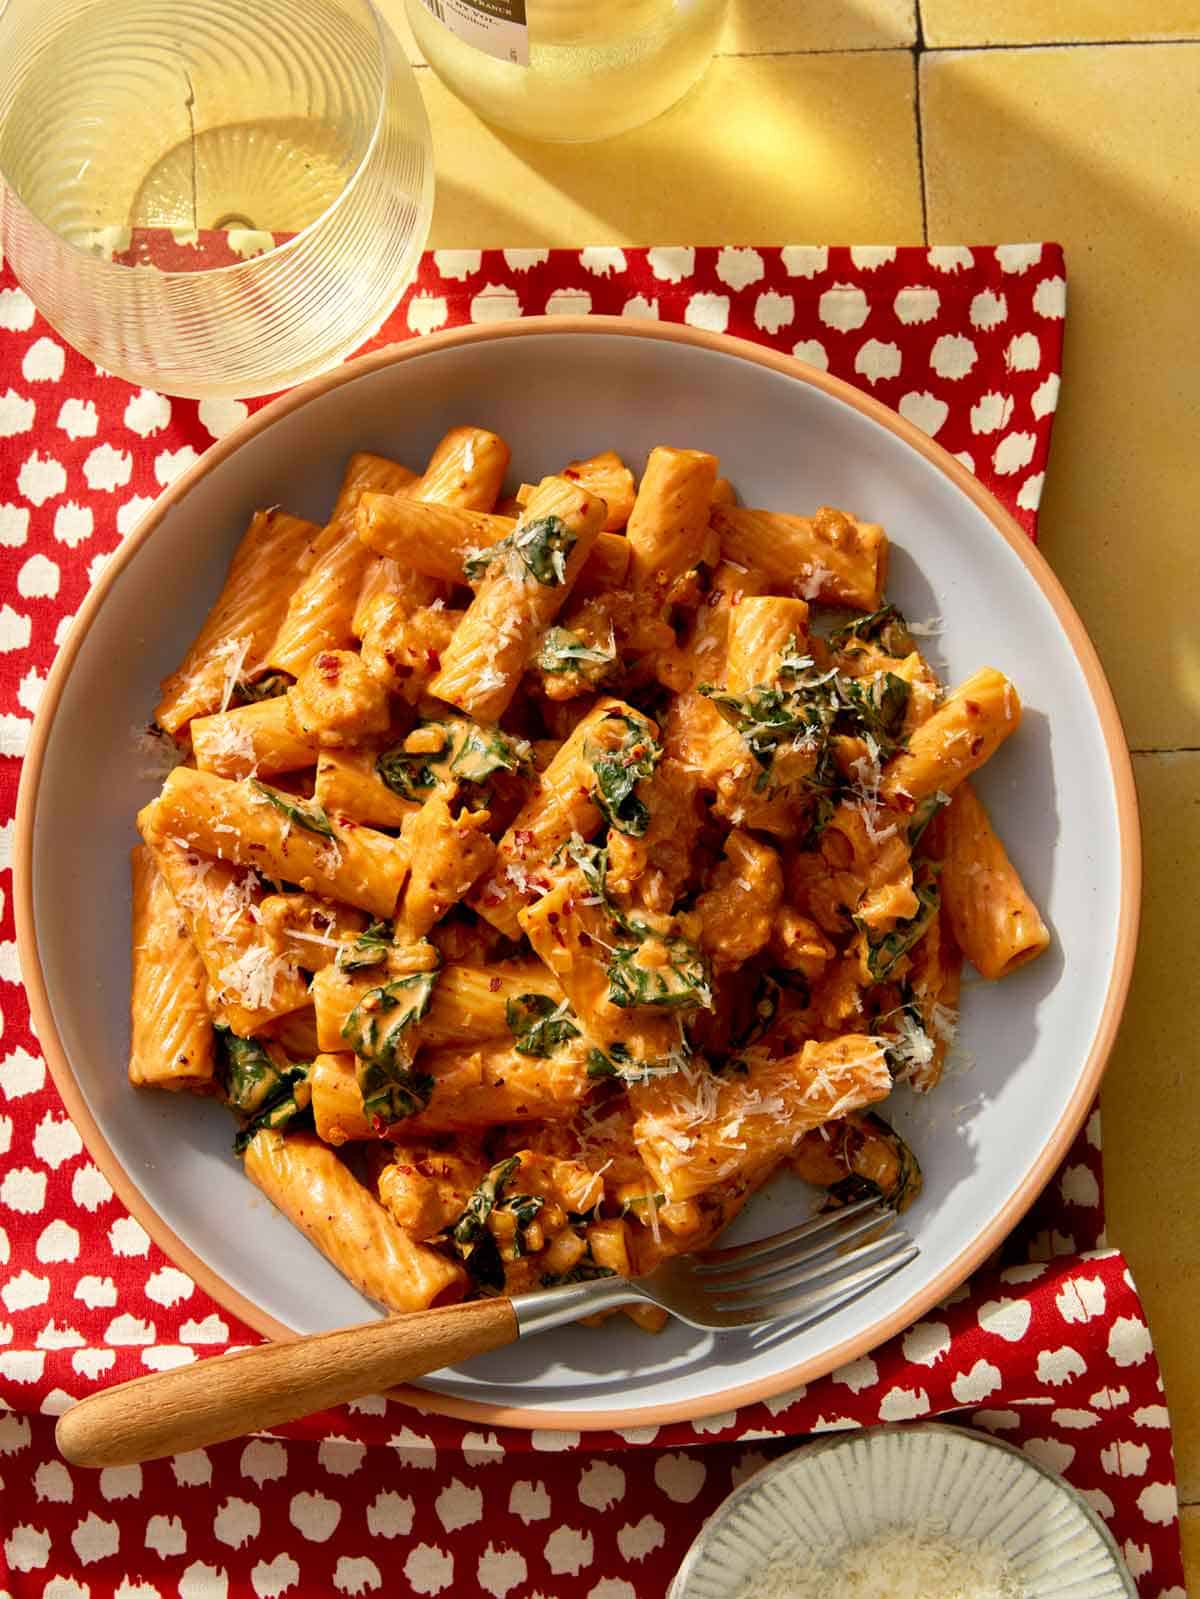
Kale and Sausage Rigatoni
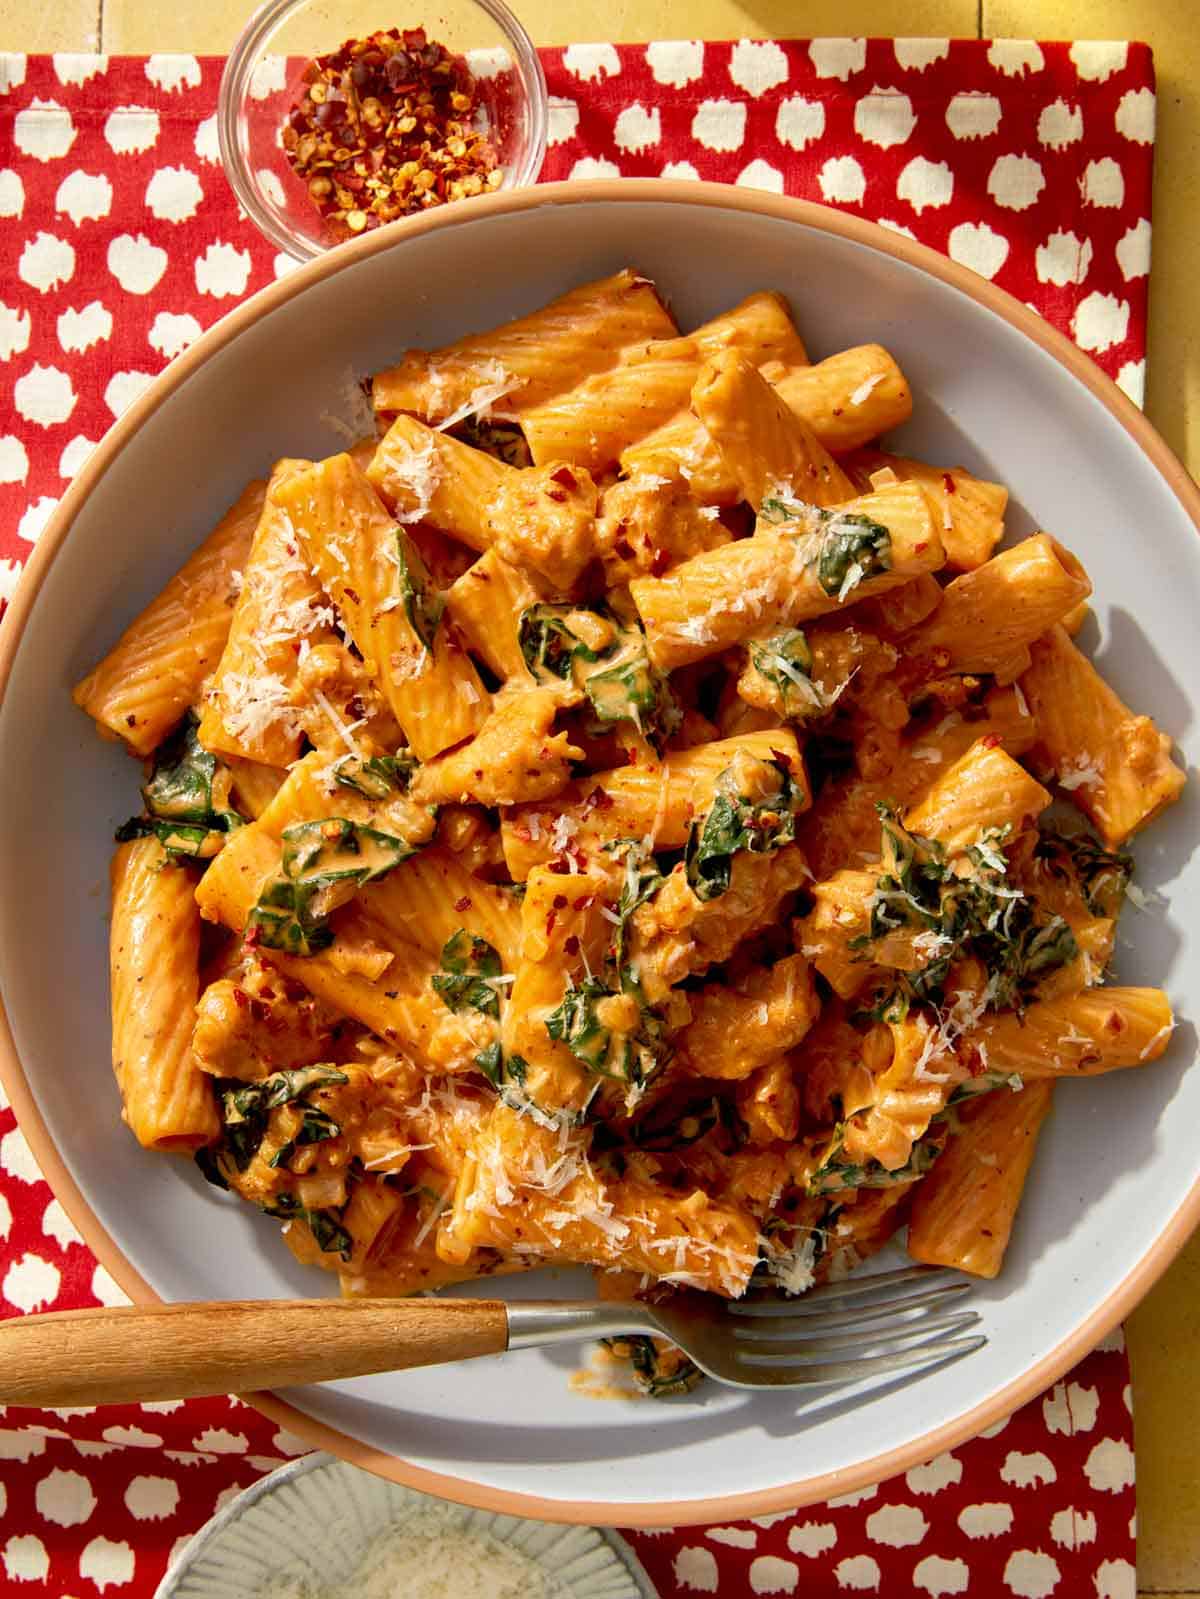
This Kale and Sausage Rigatoni Recipe brings together all the things we love about Italian comfort food, with its rich, creamy sauce, savory sausage, and hearty greens. The only thing we love more than the flavor is that you’ll spend less than 30 minutes preparing it, making it perfect for a busy weeknight.
While you could use other noodles for this pasta dish, rigatoni has a special spot in our food-loving hearts. Just like with our Spicy Rigatoni Recipe and Rigatoni with Romesco Sauce, the pasta makes all the difference. The thick, tubular shape catches all the creamy, cheesy tomato sauce, so every bite is a little explosion of comfort and flavor.
How to Make Our Kale and Sausage Rigatoni Recipe
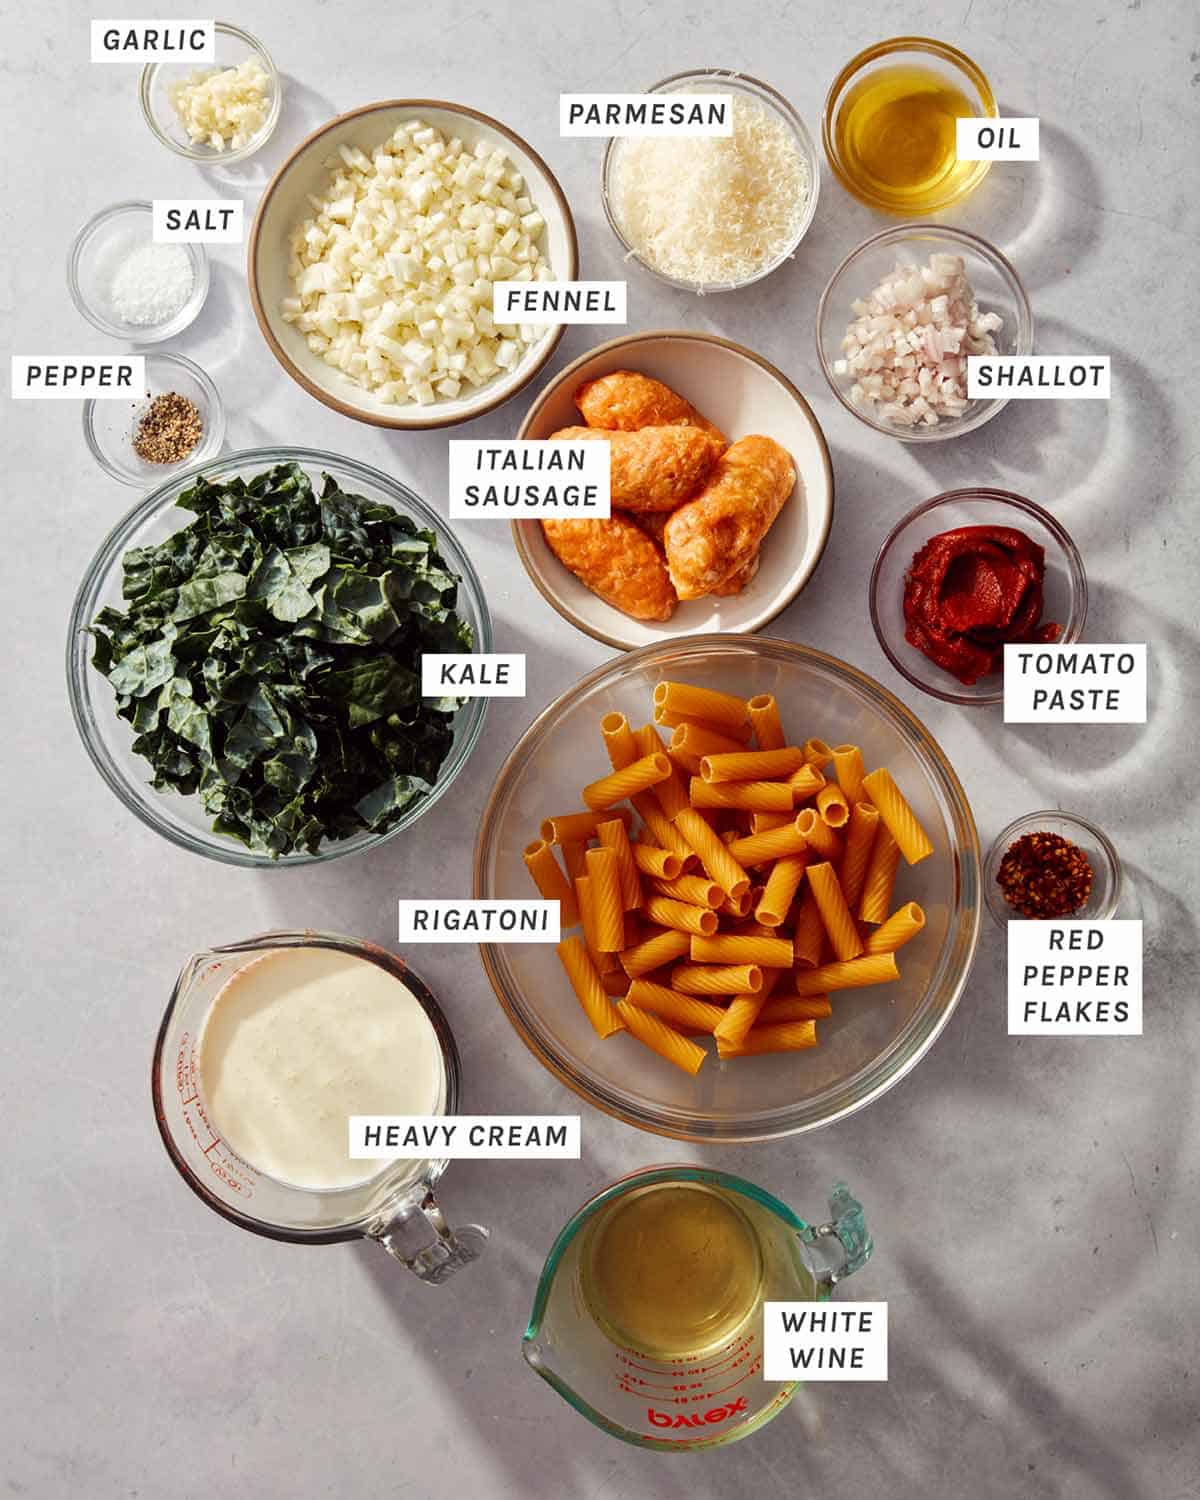
Ingredients
Process
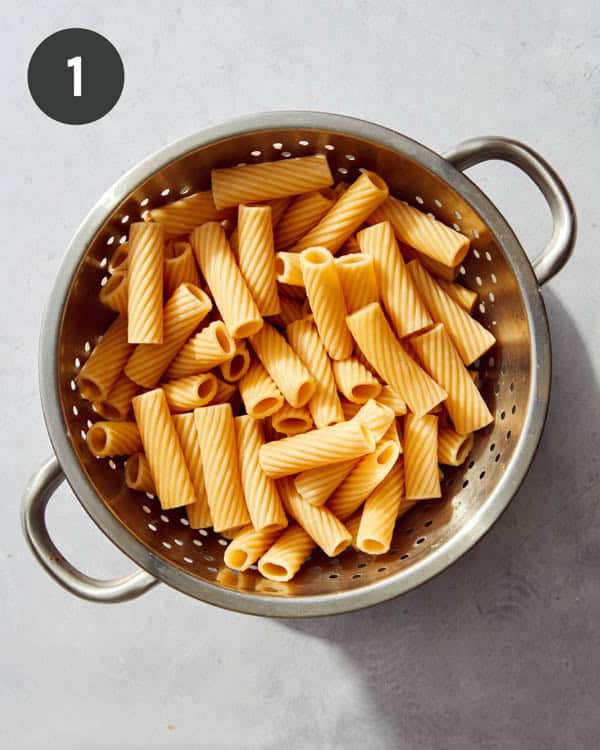
- Place a large pot, filled with water, over high heat and bring to a boil. Add a small handful of salt followed by the pasta. Bring to a boil and stir. Boil pasta for 7 to 8 minutes or until al dente. Drain pasta into a colander. Set aside.
- Place a large skillet over medium heat and add 1 1/2 tablespoons oil. Once hot, add sausage. Using a wooden spoon, break sausage apart until evenly crumbled and browned.
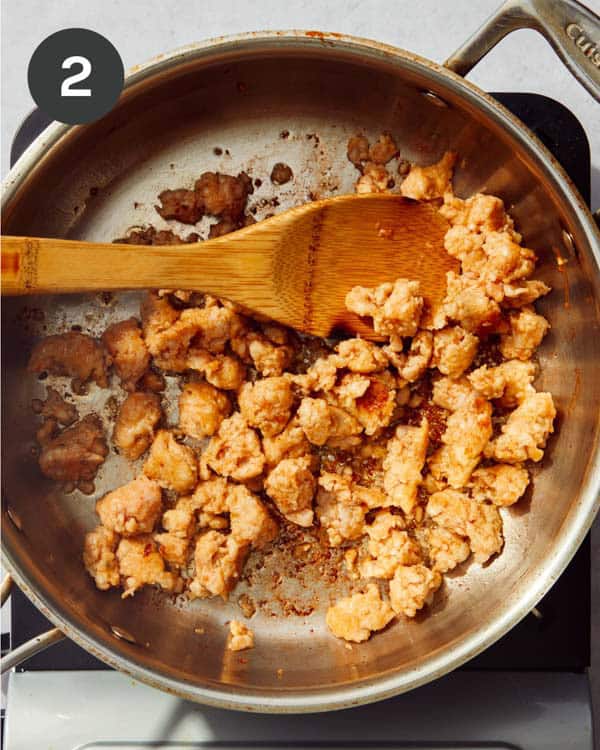
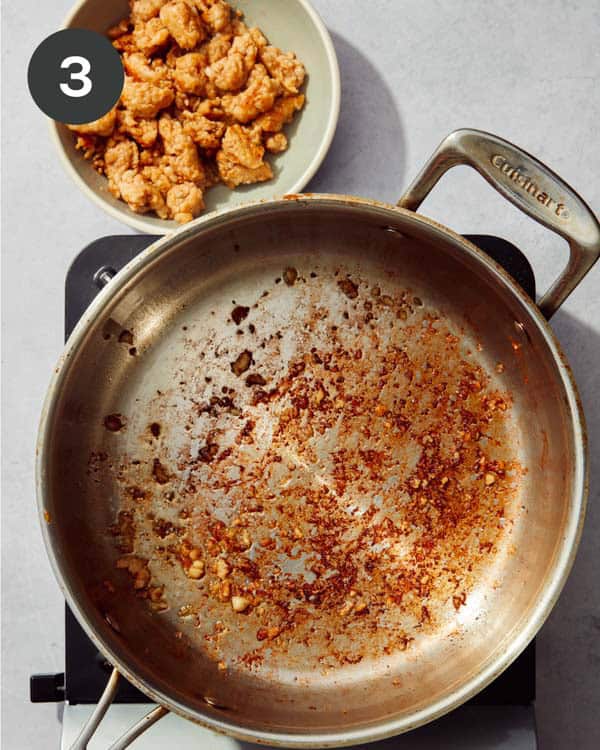
- Transfer sausage to a plate and return skillet to stove.
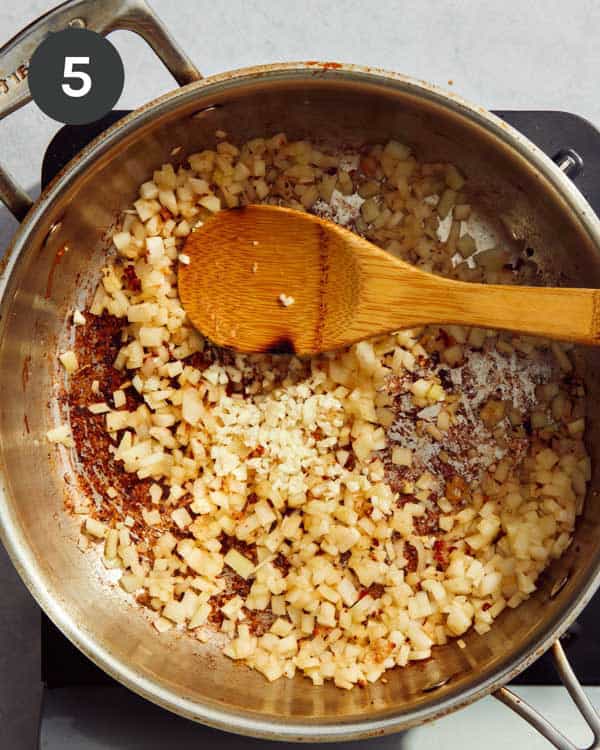
- Add remaining oil. Once hot, add shallot and fennel (if using) and sauté for 2 to 3 minutes. Season with salt and pepper.

- Stir in garlic and continue to sauté for 30 seconds.
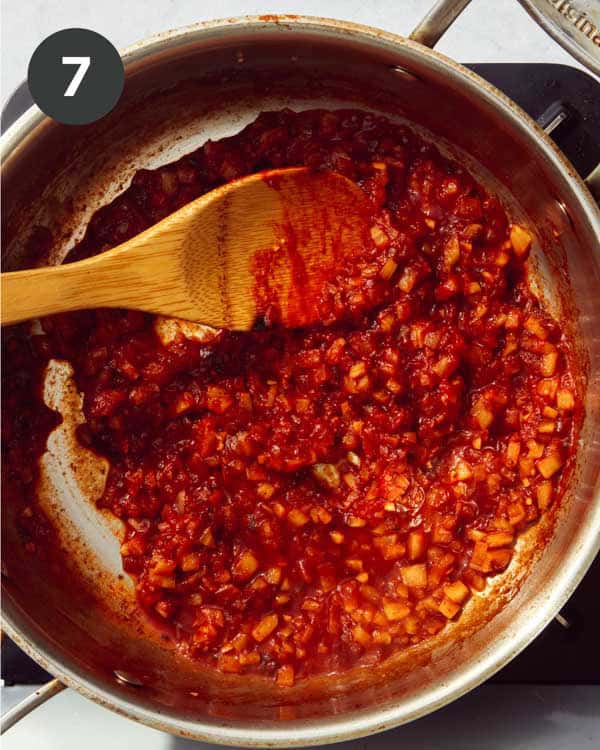
- Add tomato paste and stir for 1 minute.
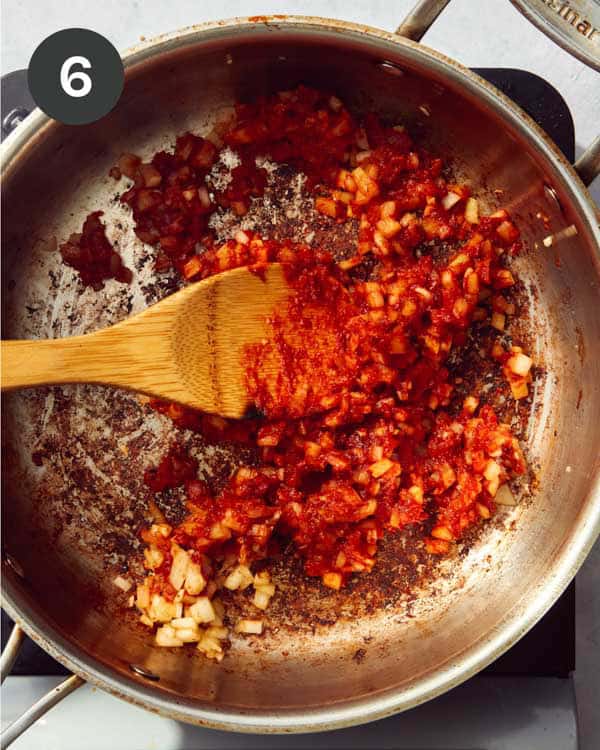
- Deglaze the skillet with the wine or stock, scraping up the bits on the bottom with a wooden spoon. Continue to cook until the liquid has mostly evaporated.
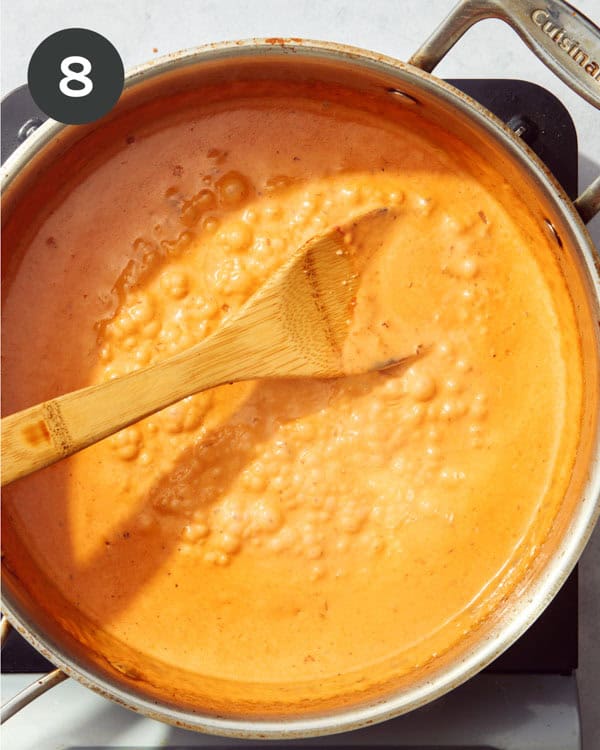
- Stir in cream and reduce heat to medium-low. Season with salt and pepper and stir. Simmer sauce until reduced by half, 3 to 4 minutes.
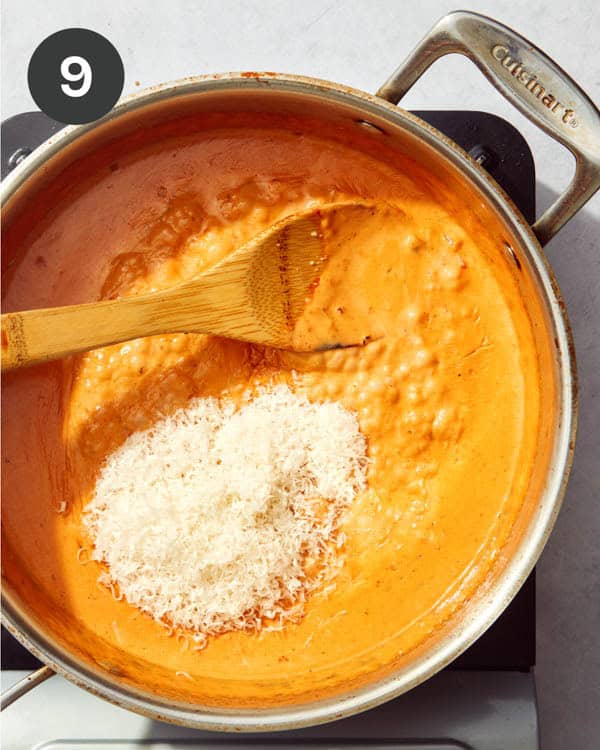
- Gently stir in Parmesan until fully incorporated and sauce is smooth and creamy.
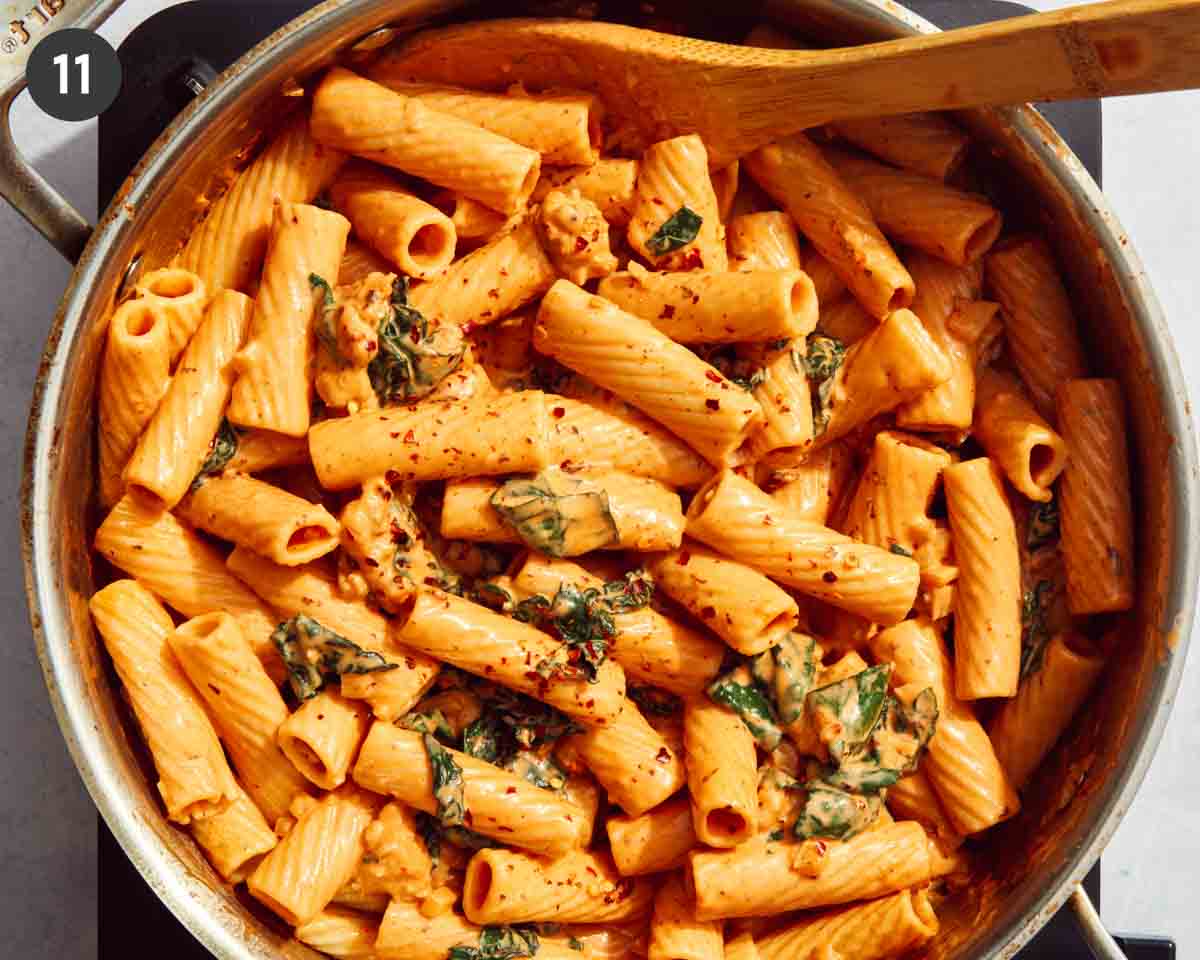
- Stir sausage back into skillet, along with kale and pepper flakes and simmer for 3 to 4 minutes.

- Add pasta to skillet and gently stir into sauce. Season with salt and pepper and serve with more grated Parmesan and crushed red pepper flakes.
Why We Love This Rigatoni Recipe
- It’s quick and easy: This whole dish comes together in under 30 minutes, and once you’ve boiled your pasta, the rest takes just one skillet, making clean up just as quick and easy.
- It’s incredibly adaptable: While this recipe is tested and approved with the ingredients we’ve used, you can easily swap out several options to make it your own. Make it spicy with a spicy Italian sausage, or even vegetarian by swapping the sausage for a plant-based meat or white beans. Regular kale and even spinach can be used in place of the Tuscan kale, and if you don’t like or can’t find fennel, swap it for bell peppers, leeks, or a diced onion.
- It’s a complete meal in one: With pasta, protein, and veggies made in just one dish, you don’t have to stress about what sides you’ll serve it with (although we do have several at the bottom just in case!).
Prepping Our Rigatoni Recipe Ahead of Time
Sure, this recipe comes together in less than 30 minutes, but we all know that some nights, even 30 minutes isn’t fast enough. Here are some ways to make this dinner come together even faster.
- Prep the veggies ahead of time: Dice the shallot, fennel, and garlic up to a few days beforehand and store in the refrigerator. And since the fennel and shallot are getting tossed in together, go ahead and store them together!
- Prepare the pasta ahead: Making the pasta the night before can help make this a real one-dish meal. Just prepare the pasta until Al dente, stir in a drizzle of olive oil, cool, and store in the refrigerator for 1-2 days. Make sure to save a small dish of pasta water to add to the sauce!
- Brown and crumble the sausage: Cook and crumble the Italian sausage up to two days ahead of time and store it in the refrigerator. While doing this step ahead will result in a small reduction in flavor (deglazing the browned bits adds a good amount of complexity), it will save several minutes on the night of.
Or, to meal prep the entire dish, but still feel like you’re eating a freshly cooked meal:
- Make this recipe up to step 9. Stir in the sausage, but then let the dish cool. Cover or place in an airtight container in the refrigerator for up to 24 hours.
- Place the contents back into a pan and on the stove. Slowly reheat over low, stirring so everything warms evenly. Add a splash more chicken broth if needed. Then proceed with the recipe, adding the kale, parmesan, and pasta.
Storing and Reheating Leftovers
With a little extra liquid added, this rigatoni is just as good the next day, making it a good option for meal prep or enjoying leftovers.
- To store leftovers: Transfer any leftover rigatoni to an airtight container and refrigerate for up to 3-4 days. The pasta will continue to absorb the sauce as it sits, so the consistency will be a bit thicker when you reheat it, but you can easily thin it out by stirring in a bit more cream or chicken broth. Since this is a cream-based pasta, its texture may turn a bit curdled or gritty if frozen, so we don’t recommend this method of storage.
- To reheat on the stovetop (our preferred method): Place the leftover pasta in a skillet over medium-low heat. Add a splash of cream, milk, or chicken broth (2-3 tablespoons at a time) to loosen the sauce and bring it back to a creamy consistency. Stir the pasta occasionally as it warms through, for about 5 to 7 minutes.
- To reheat in the microwave: Transfer a portion to a microwave-safe bowl and add a tablespoon or two of cream or milk. Cover the bowl with a damp paper towel or microwave-safe cover, then microwave for 45-60 seconds at a time, stirring in between, until heated through.
What to Serve with Our Kale and Sausage Rigatoni
Whether you’re enjoying this dish for a quick weeknight meal or a weekend dinner, these easy sides are always a hit:
- Caesar Salad
- Cheesy Herb Beer Bread
- Simple Panzaella Salad
- Greek Salad
- Roasted Green Beans
- Broccoli Crunch Salad
- Garlic Bread
- Bruschetta
More Delicious Pasta Recipes You Will Love


Kale and Sausage Rigatoni Recipe
Ingredients
- 8 ounces dry rigatoni
- 8 ounces mild Italian chicken sausage removed from casing
- 3 tablespoons olive oil divided
- 3 tablespoons minced shallot
- 1 cup finely diced fennel bulb
- 2 minced garlic cloves
- 3 tablespoons tomato paste
- 1/3 cup dry white wine (or chicken stock)
- 1 1/2 cups heavy cream
- 1 bunch torn (in small pieces) and massaged Tuscan kale ribs removed (about 3 heaping cups)
- 1 1/2 ounces freshly grated Parmesan cheese plus more for sprinkling
- 1 teaspoon crushed red pepper flakes (optional) plus more for sprinkling
- salt and pepper to taste
Instructions
- Place a large pot, filled with water, over high heat and bring to a boil. Add a small handful of salt followed by the pasta. Bring to a boil and stir. Boil pasta for 7 to 8 minutes or until al dente. Drain pasta into a colander. Set aside.
- Place a large skillet over medium heat and add 1 1/2 tablespoons oil. Once hot, add sausage. Using a wooden spoon, break sausage apart until evenly crumbled and browned.
- Transfer sausage to a plate and return skillet to stove.
- Add remaining oil. Once hot, add shallot and fennel (if using) and sauté for 2 to 3 minutes. Season with salt and pepper.
- Stir in garlic and continue to sauté for 30 seconds.
- Add tomato paste and stir for 1 minute.
- Deglaze the skillet with the wine or stock, scraping up the bits on the bottom with a wooden spoon. Continue to cook until the liquid has mostly evaporated.
- Stir in cream and reduce heat to medium-low. Season with salt and pepper and stir. Simmer sauce until reduced by half, 3 to 4 minutes.
- Stir sausage back into skillet, along with kale and pepper flakes and simmer for 3 to 4 minutes.
- Gently stir in Parmesan until fully incorporated and sauce is smooth and creamy.
- Add pasta to skillet and gently stir into sauce. Season with salt and pepper and serve with more grated Parmesan and crushed red pepper flakes.
Notes
- To store leftovers: Transfer any leftover rigatoni to an airtight container and refrigerate for up to 3-4 days. The pasta will continue to absorb the sauce as it sits, so the consistency will be a bit thicker when you reheat it, but you can easily thin it out by stirring in a bit more cream or chicken broth. Since this is a cream-based pasta, its texture may turn a bit curdled or gritty if frozen, so we don’t recommend this method of storage.
- To reheat on the stovetop (our preferred method): Place the leftover pasta in a skillet over medium-low heat. Add a splash of cream, milk, or chicken broth (2-3 tablespoons at a time) to loosen the sauce and bring it back to a creamy consistency. Stir the pasta occasionally as it warms through, for about 5 to 7 minutes.
- To reheat in the microwave: Transfer a portion to a microwave-safe bowl and add a tablespoon or two of cream or milk. Cover the bowl with a damp paper towel or microwave-safe cover, then microwave for 45-60 seconds at a time, stirring in between, until heated through.
Nutrition
The post Kale and Sausage Rigatoni appeared first on Spoon Fork Bacon.
Fairy Tale #3


Look! I remembered to post before December started this year!
The standard explanation: For the entire month of December, all orders made in the Shop of points and paid time, either for you or as a gift for a friend, will have 10% of your completed cart total sent to you in points when you finish the transaction. For instance, if you buy an order of 12 months of paid time for $35 (350 points), you'll get 35 points when the order is complete, to use on a future purchase.
( The fine print and much more behind this cut! )
Thank you, in short, for being the best possible users any social media site could possibly ever hope for. I'm probably in danger of crossing the Sappiness Line if I haven't already, but you all make everything worth it.
On behalf of Mark, Jen, Robby, and our team of awesome volunteers, and to each and every one of you, whether you've been with us on this wild ride since the beginning or just signed up last week, I'm wishing you all a very happy set of end-of-year holidays, whichever ones you celebrate, and hoping for all of you that your 2026 is full of kindness, determination, empathy, and a hell of a lot more luck than we've all had lately. Let's go.
More About Lighting
At the Beach
Like in the scenes of Baron and Naomi's family holiday at the beach. I set up the scene, and then went to lay down on a tarp on the sand a few metres away, so I'd be down at the doll's eye level, and then I'd direct Jan to make any small adjustments if needed...


Iris' New Dress


Lighting


